


1. Why We Need This Use Case
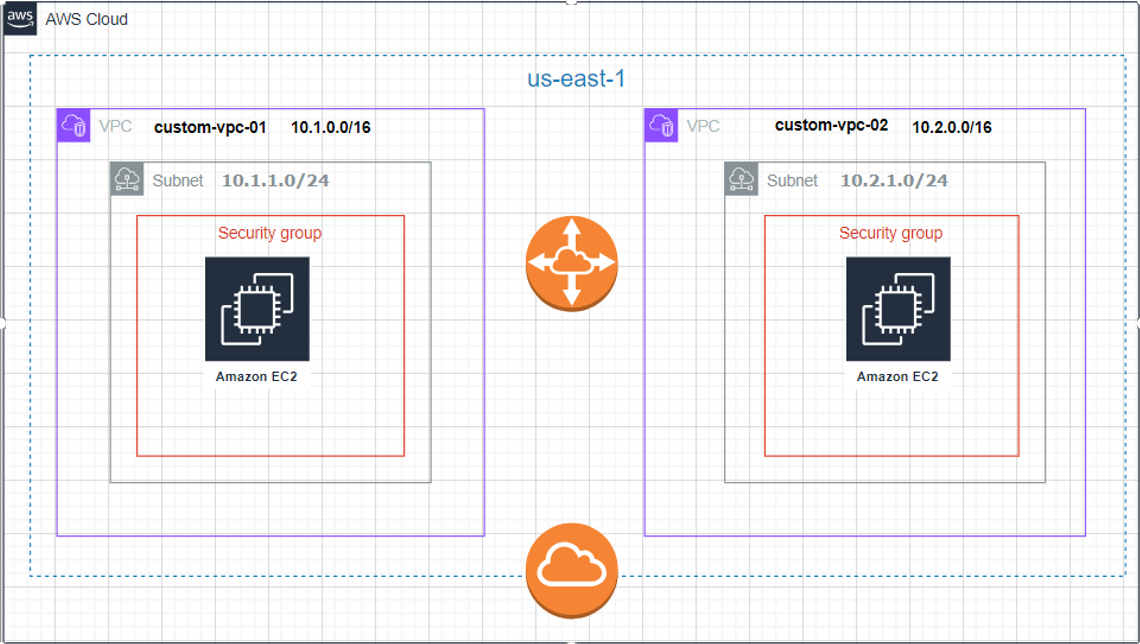
Virtual Private Cloud (VPC) peering in AWS enables the networking connection between two VPCs, allowing you to route traffic between them using private IPv4 or IPv6 addresses. This setup is crucial for scenarios where you need to share resources, such as databases or file systems, between VPCs without the data traversing the public internet, thereby enhancing security and reducing latency..
2. When We Need This Use Case
When separate VPCs in the same or different AWS regions need to communicate securely without using public internet gateways.
When consolidating resources or services across multiple VPCs without exposing data to the external network.
When implementing disaster recovery by syncing data across VPCs in different geographic locations.
When extending a corporate network to the cloud and requiring interconnection between different cloud resources.
3. Prerequisites for the Lab
At least two AWS accounts with VPCs set up, or multiple VPCs within the same account.
Necessary IAM permissions to manage VPCs, route tables, and VPC peering connections.
Basic understanding of AWS networking, VPCs, route tables, and IP addressing.
Access to the AWS Management Console or AWS CLI with appropriate configurations.
4. Advantages and Disadvantages of This Use Case
Advantages
Security: Keeps traffic between VPCs private and secure, avoiding exposure to the public internet.
Cost-Effectiveness: Reduces costs by eliminating the need for data transfer via the public internet or NAT devices.
Simplicity and Flexibility: Simplifies network architecture by allowing direct connectivity between VPCs.
Latency: Typically offers lower latency than internet-based or other VPN connections due to direct routing.
Disadvantages
Complexity in Large Networks: Can become complex and difficult to manage with a large number of VPC peering connections.
Limitations: VPC peering does not support transitive peering; i.e., if VPC A is peered with VPC B, and VPC B is peered with VPC C, VPC A cannot communicate with VPC C unless directly peered.
Routing Table Maintenance: Requires careful management of route tables and IP address ranges to avoid conflicts and ensure proper routing.
5. Step-by-Step Implementation Instructions
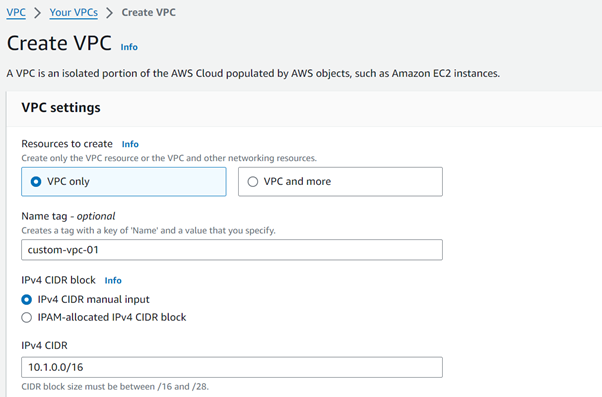
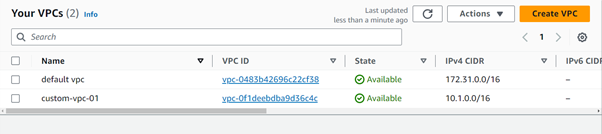
Create you first VPC
Resource to Create = Vpconly
Name = custom-vpc-01
IPv4 CIDR block = IPv4 CIDR manual input
IPv4 CIDR= 10.1.0.0/16
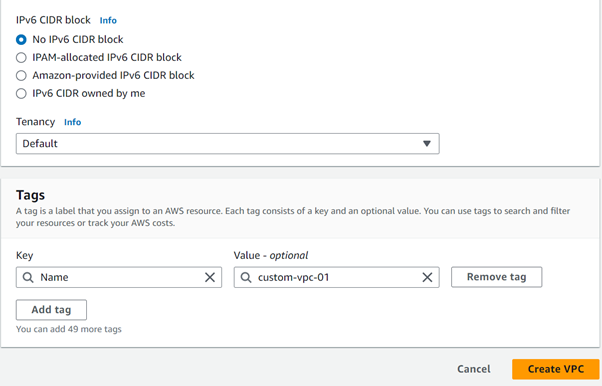
IPv6 CIDR block= No IPV6 CIDR Block
Tenancy: Default
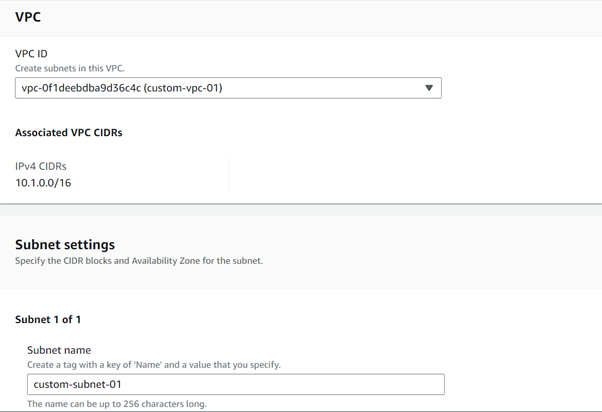
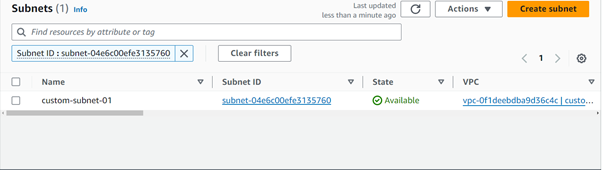
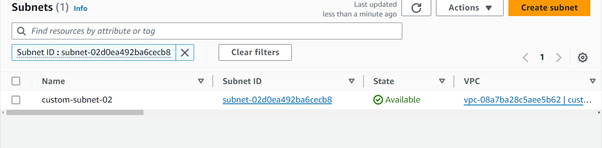
Create a first public subnet
VPC ID = custom-vpc-01
Subnet name = custom-subnet-01
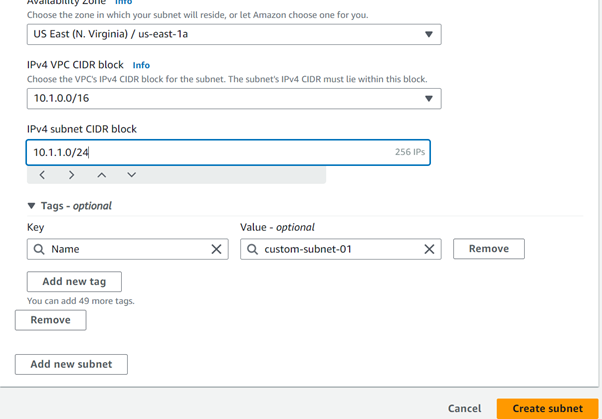
Availability Zone = us-east-1a
IPv4 VPC CIDR block = 10.1.0.0/16 (the ip provided in the custom-vpc-01 will be there)
IPv4 subnet CIDR block = 10.1.1.0/24
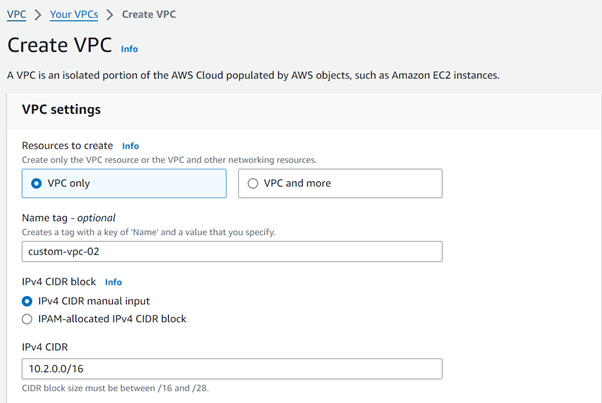
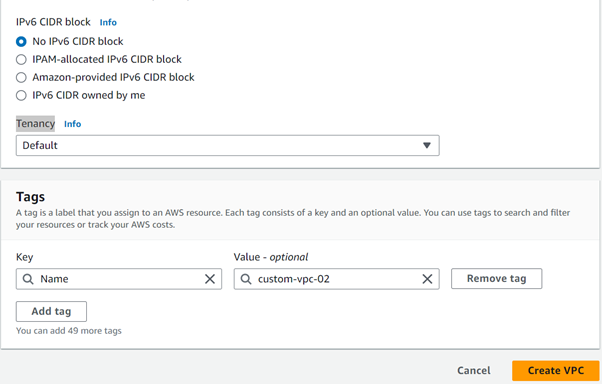
Create the Second Custom VPC
Resource to Create = Vpconly
Name = custom-vpc-02
IPv4 CIDR block = IPv4 CIDR manual input
IPv4 CIDR= 10.2.0.0/16
IPv6 CIDR block= No IPV6 CIDR Block
Tenancy: Default
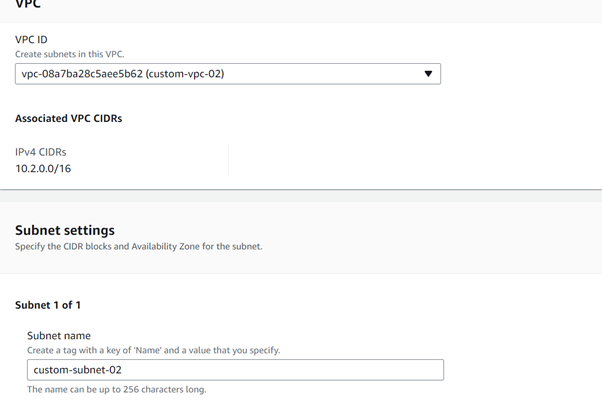
Create a Second public subnet
VPC ID = custom-vpc-02
Subnet name =
Availability Zone = us-east-1b
IPv4 VPC CIDR block = 10.2.0.0/16 (the ip provided in the custom-vpc-01 will be there)
IPv4 subnet CIDR block = 10.2.1.0/24

Create internet gateway for custom-vpc-01
Name tag = custom-vpc-01-igw
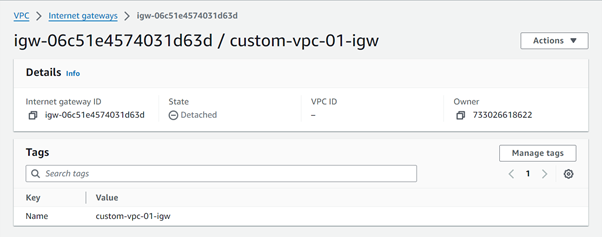

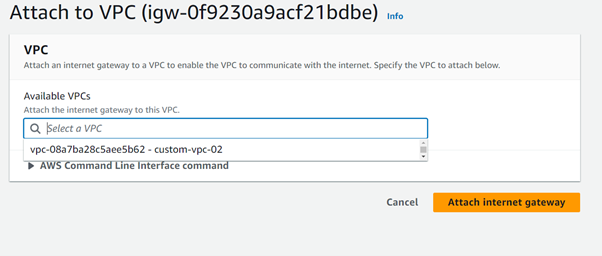
Click on attach to vpc
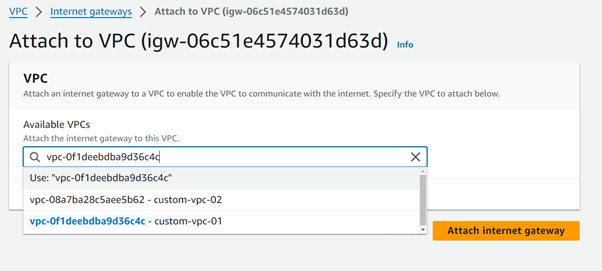
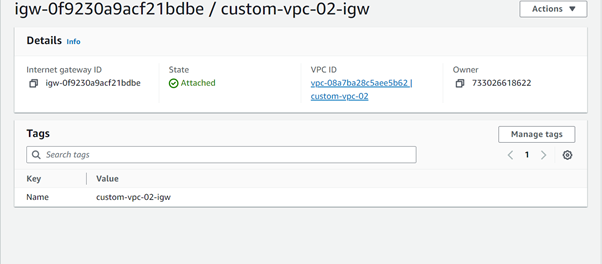
Select the custom-vpc-01 and click on attach the internet gateway
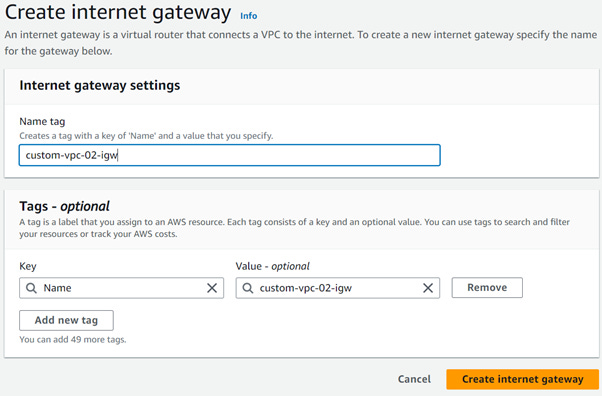
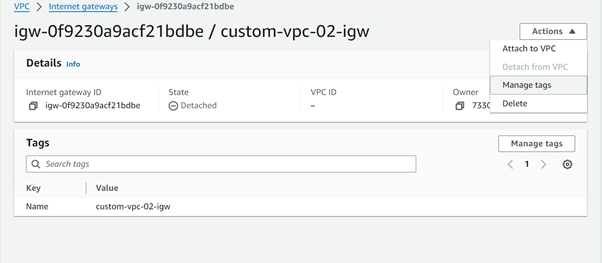
Create internet gateway for custom-vpc-02
Name tag = custom-vpc-02-igw
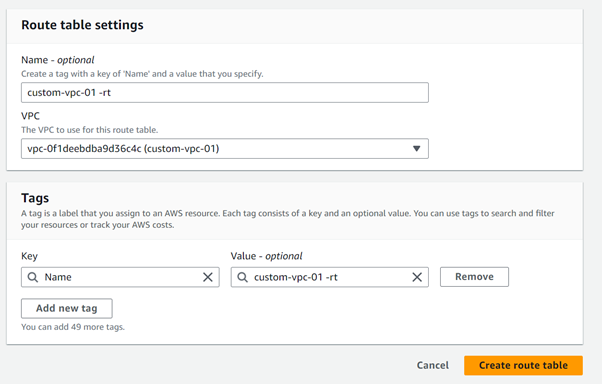
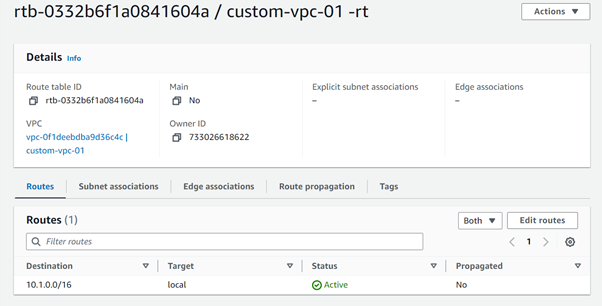
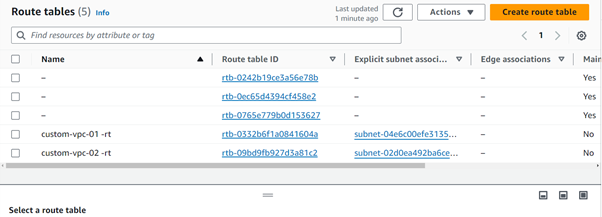
Create the routing table for the custom-vpc-01
Name = custom-vpc-01-rt
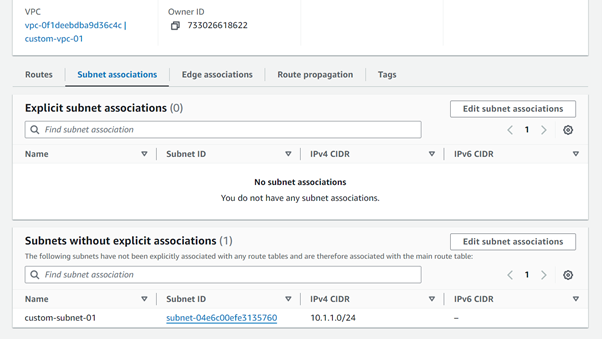
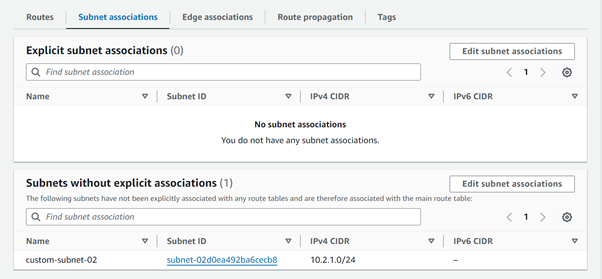
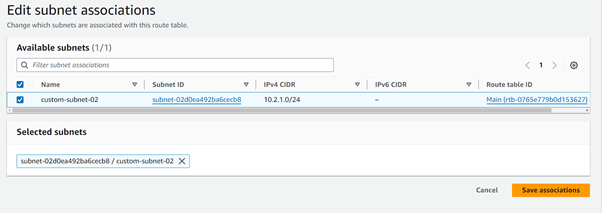
Edit the Subnet associations in the newly created custom-vpc-01-rt
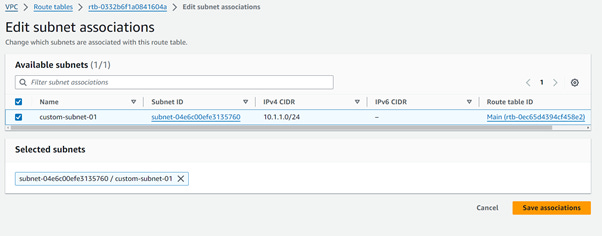
Click on the save associations
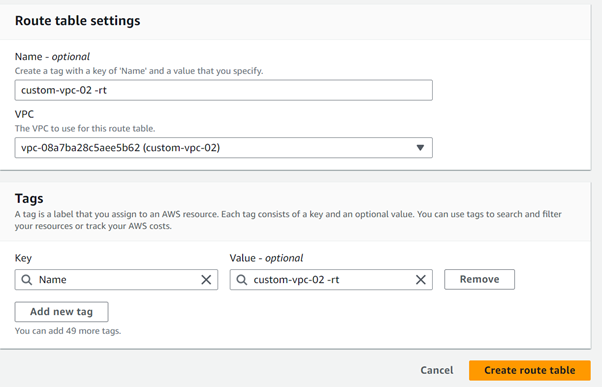
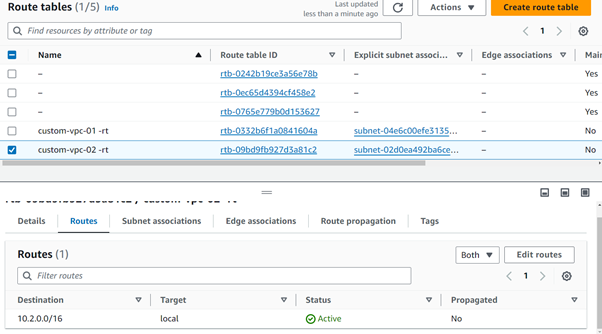
Create the routing table for the custom-vpc-02
Name = custom-vpc-02-rt
Click on save associations
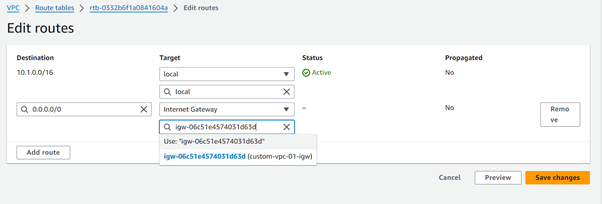
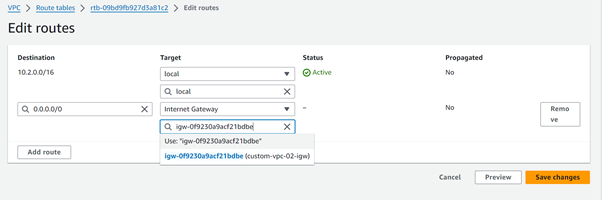
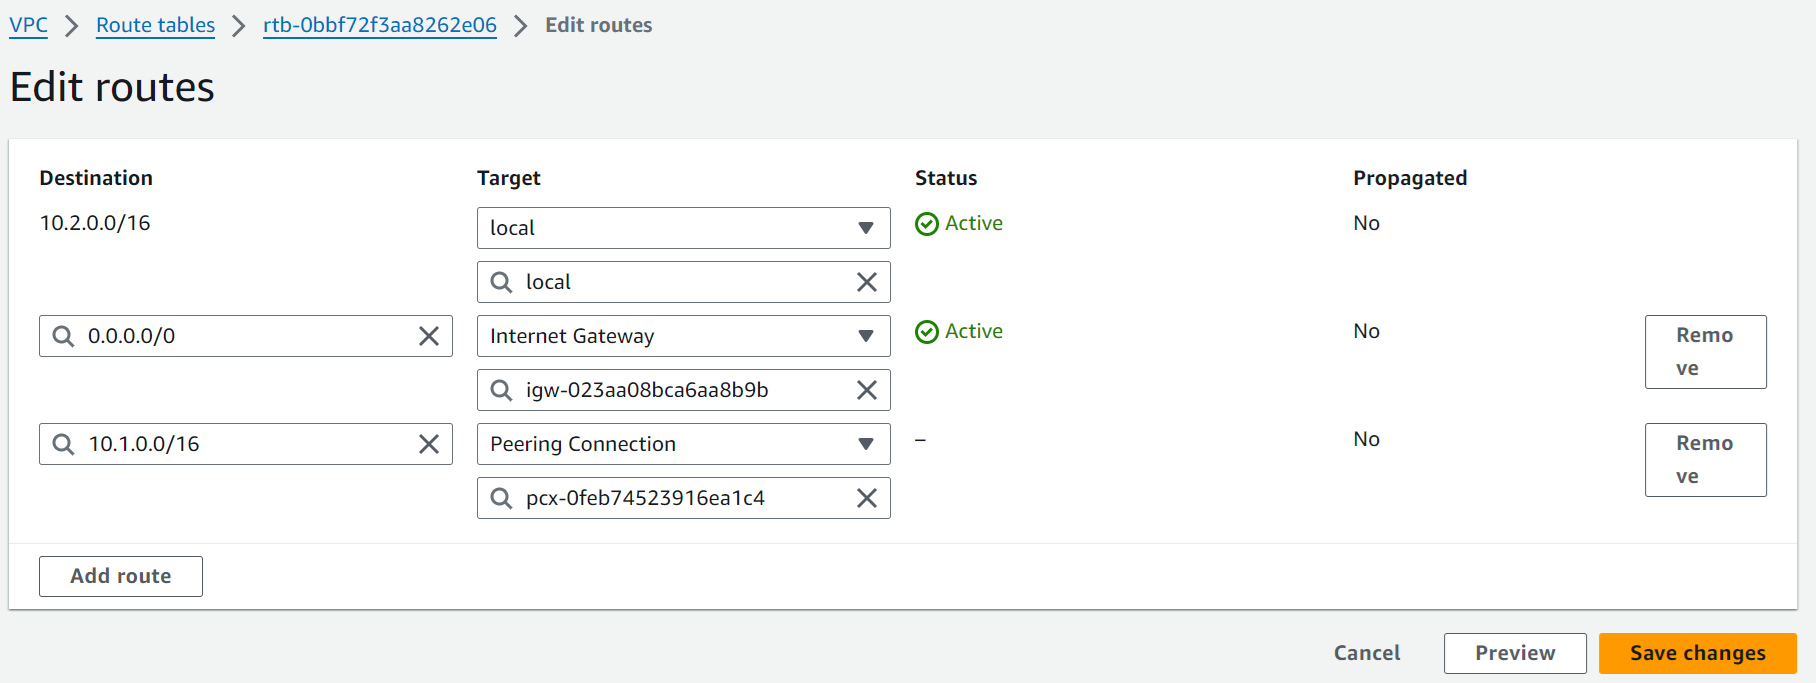
Add Route entries (0.0.0.0/0 for IGWs) to two Route Tables.
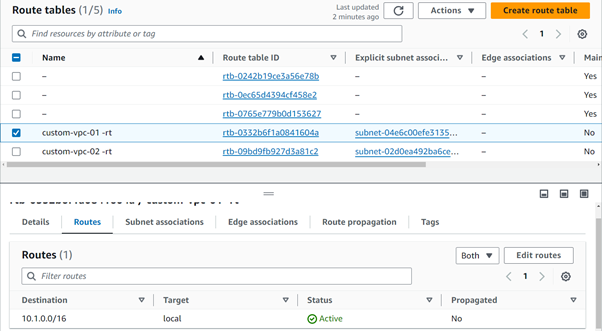
Click on the edit routes and add the below route
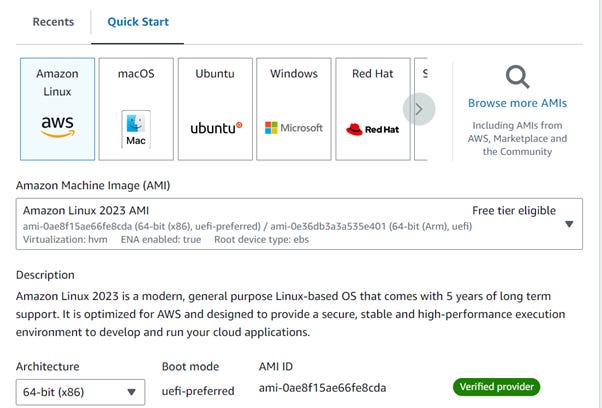
Create an 2 ec2 instances with name vm1 and vm2 in the below

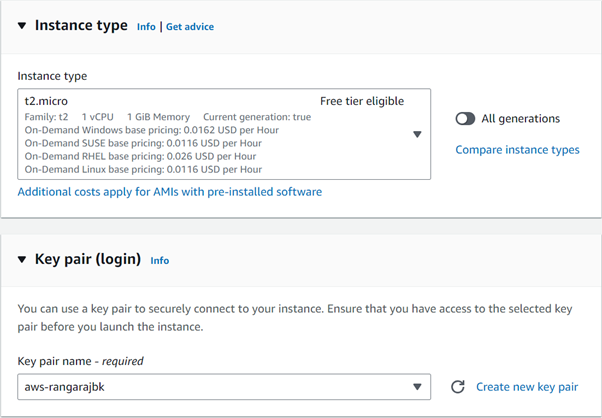

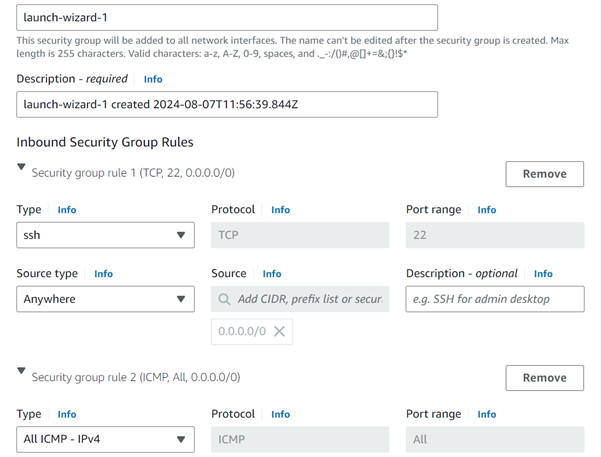
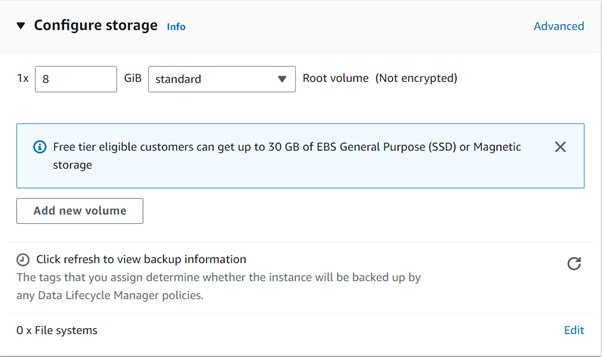
Create the vm2 with the above required parameters. Change only the vpc and subnet.

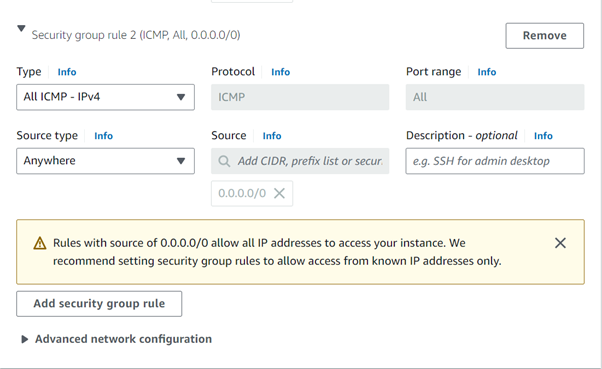
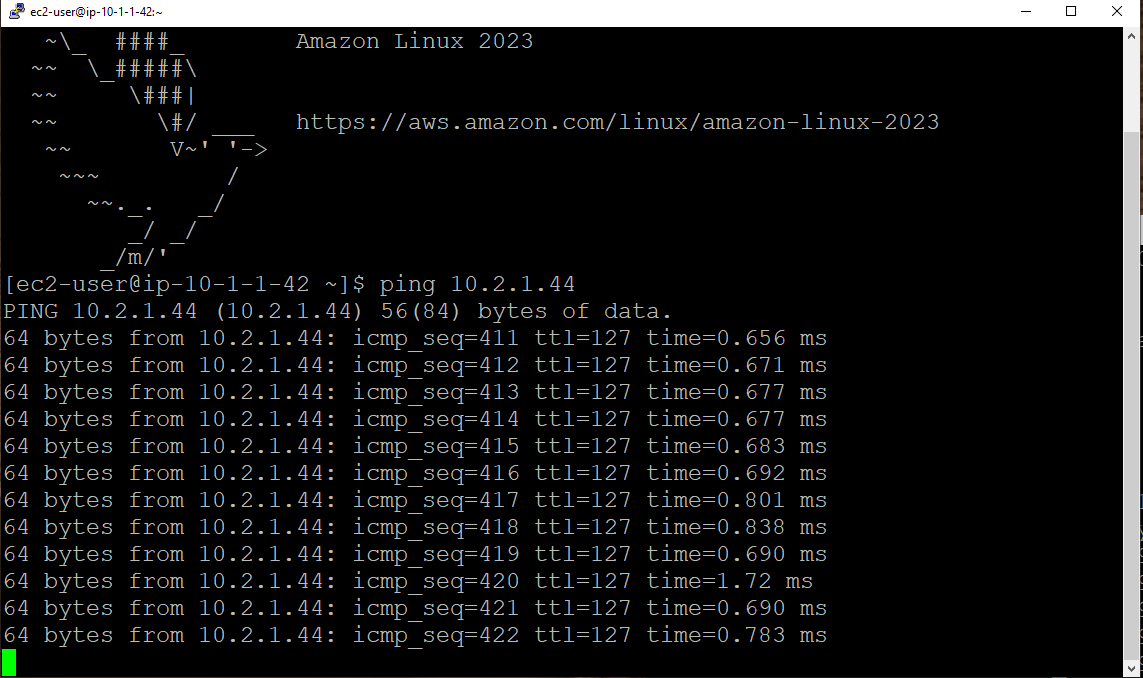
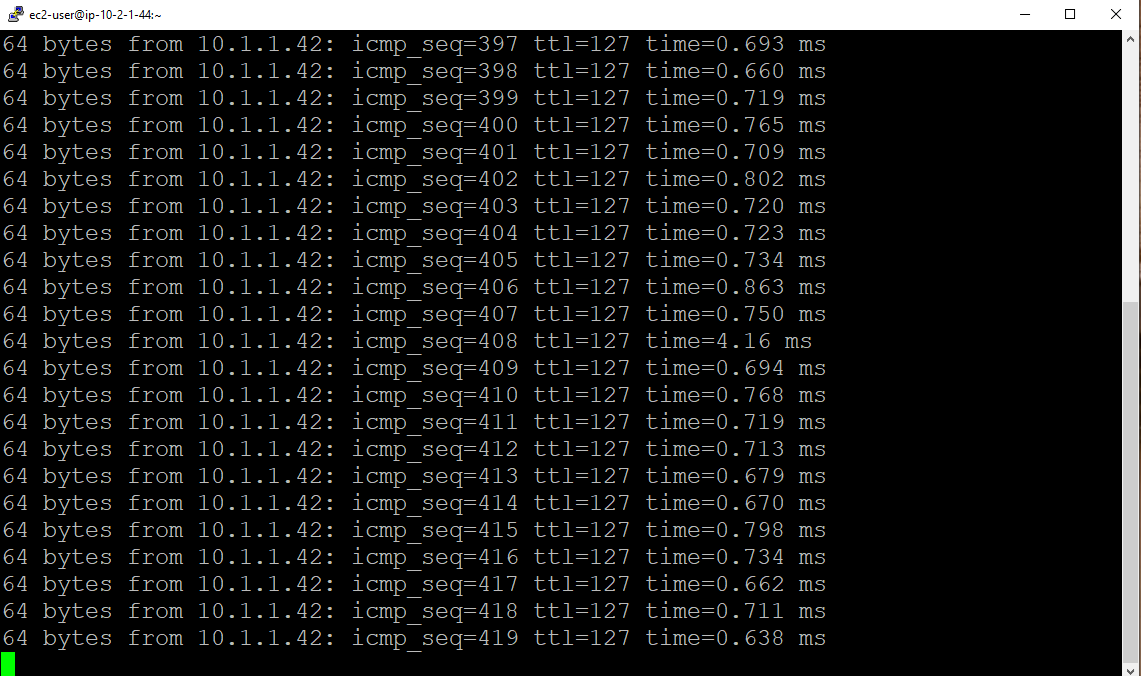
Before creating the pieering connection open the vm and test the public ip for vm1 in vm2 and vm2 in vm1 using the ping command
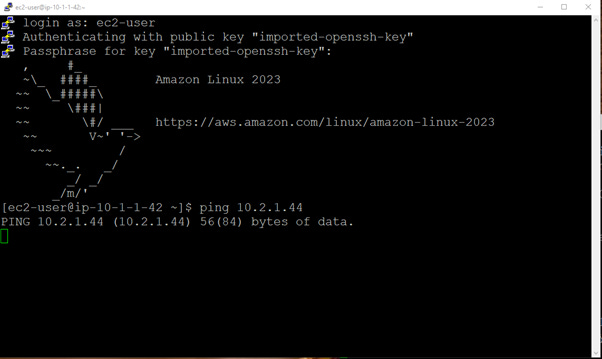
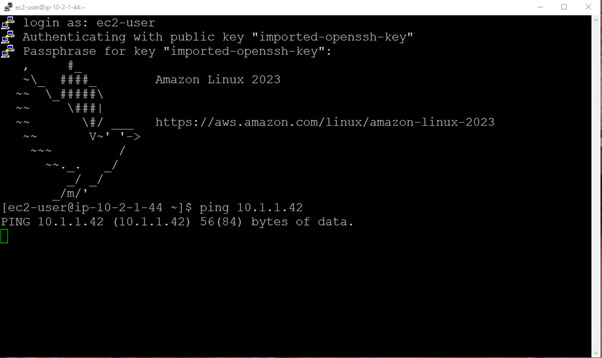
It will not work after creating the pieering connection only it will work
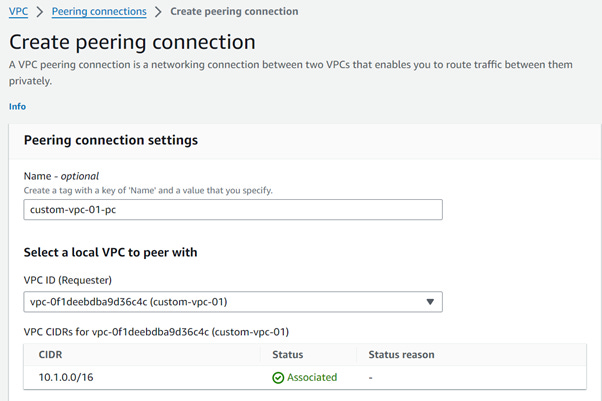
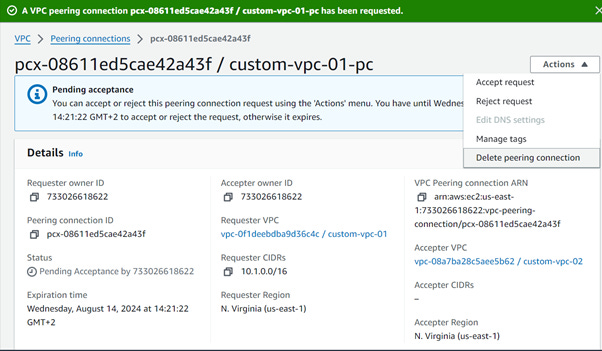
Create a VPC Peering Connection

Name = custom-vpc-01-pc
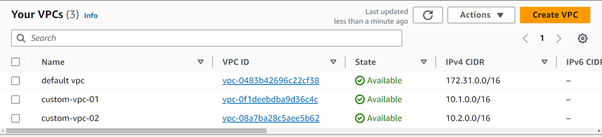
VPC ID = vpc-0f1deebdba9d36c4c(custom-vpc-01)
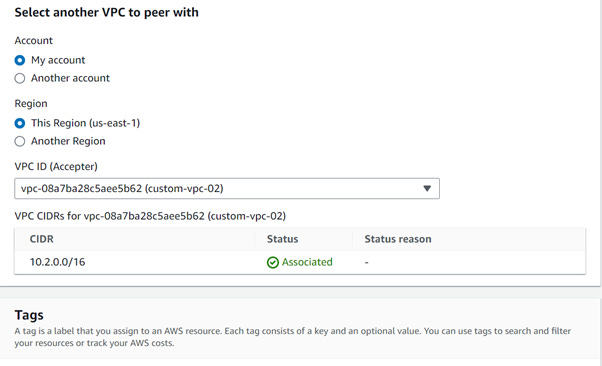
Account = My Account
Region = This Region(us-east-1)
VPC ID (Accepter) = vpc-08a7ba28c5aee5b62(custom-vpc-02)


Still you see the ping is not working on vm1 and vm2
Add the 10.2.0.0/16 ip in the custom-vpc-01-rt route table

Add the 10.1.0.0/16 ip in the custom-vpc-02-rt route table
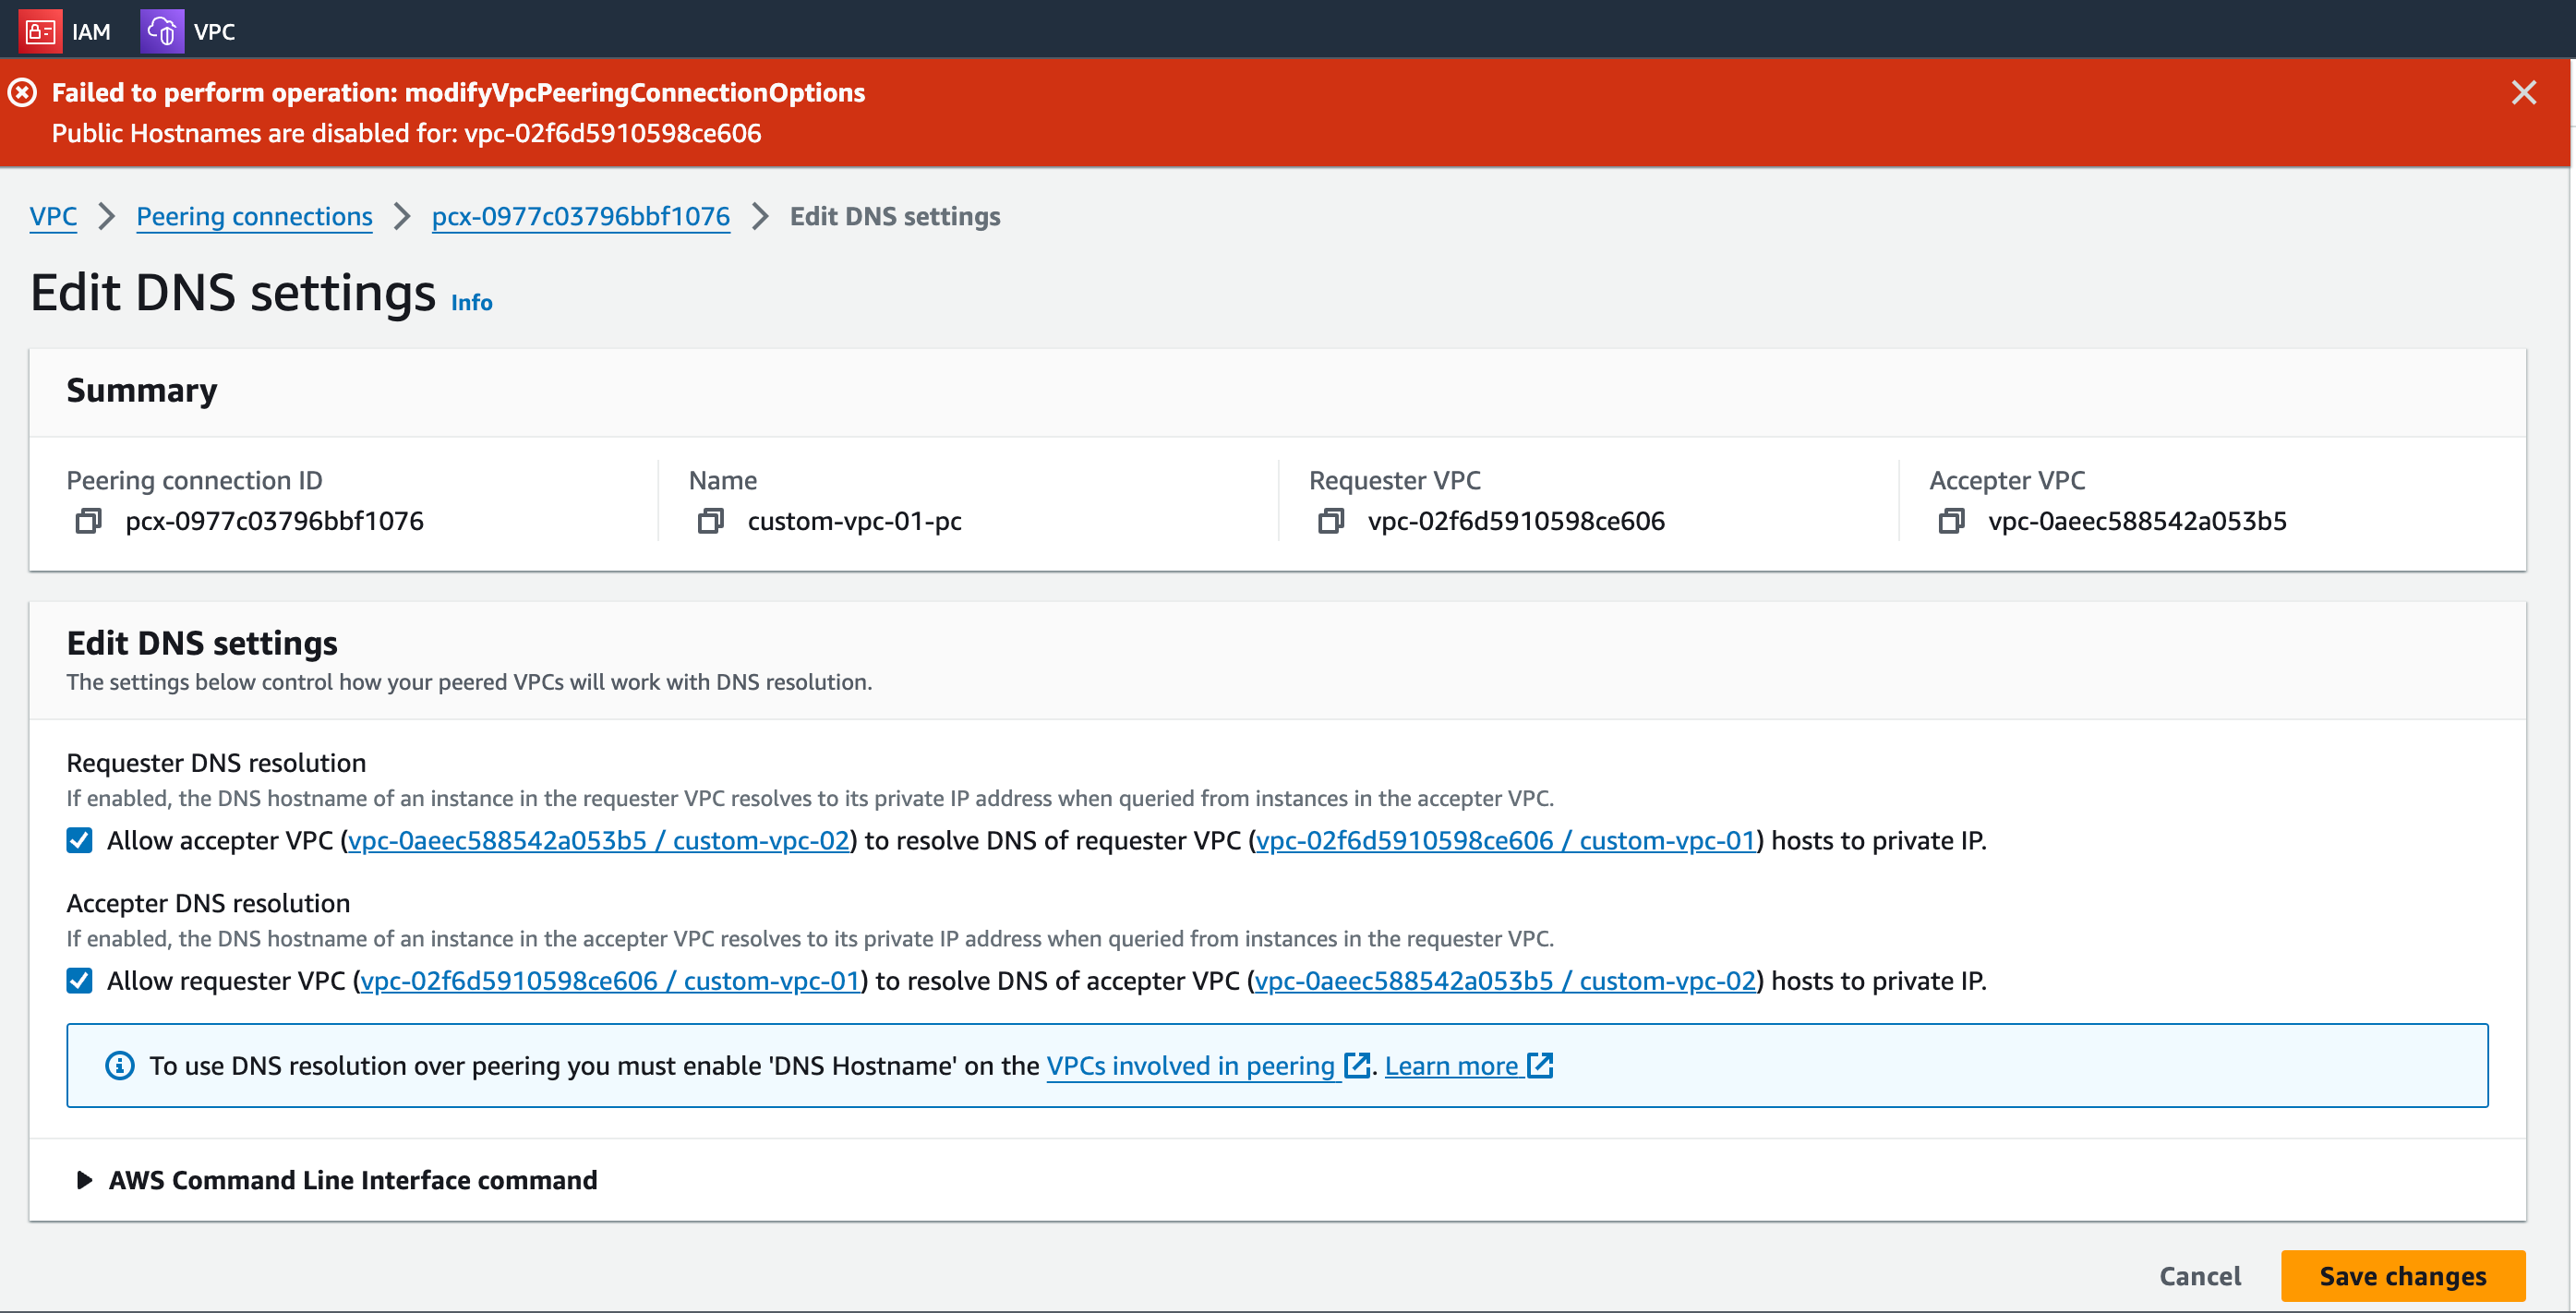
During the peering, we get the below error.
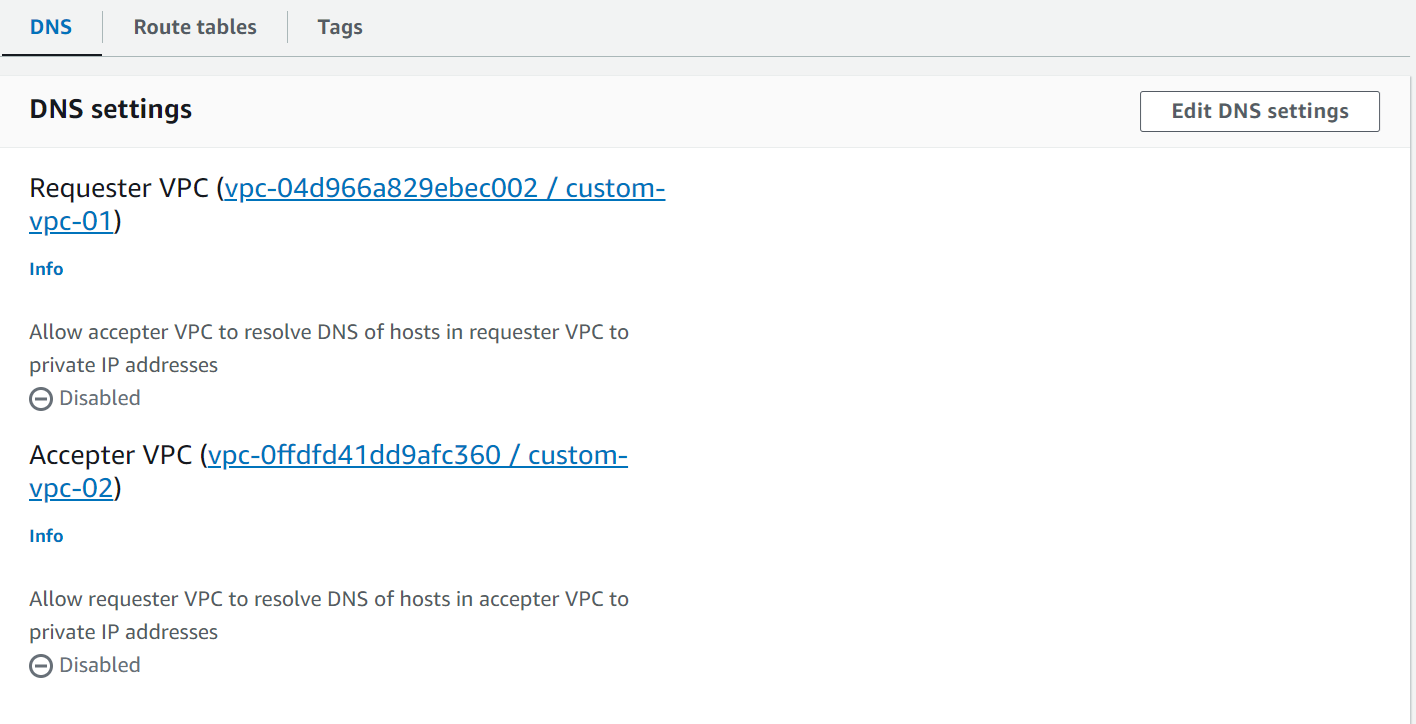
Now go to VPC and select your VPC “custom-vpc-01“ , navigate to the Actions and select and modify DNS settings.
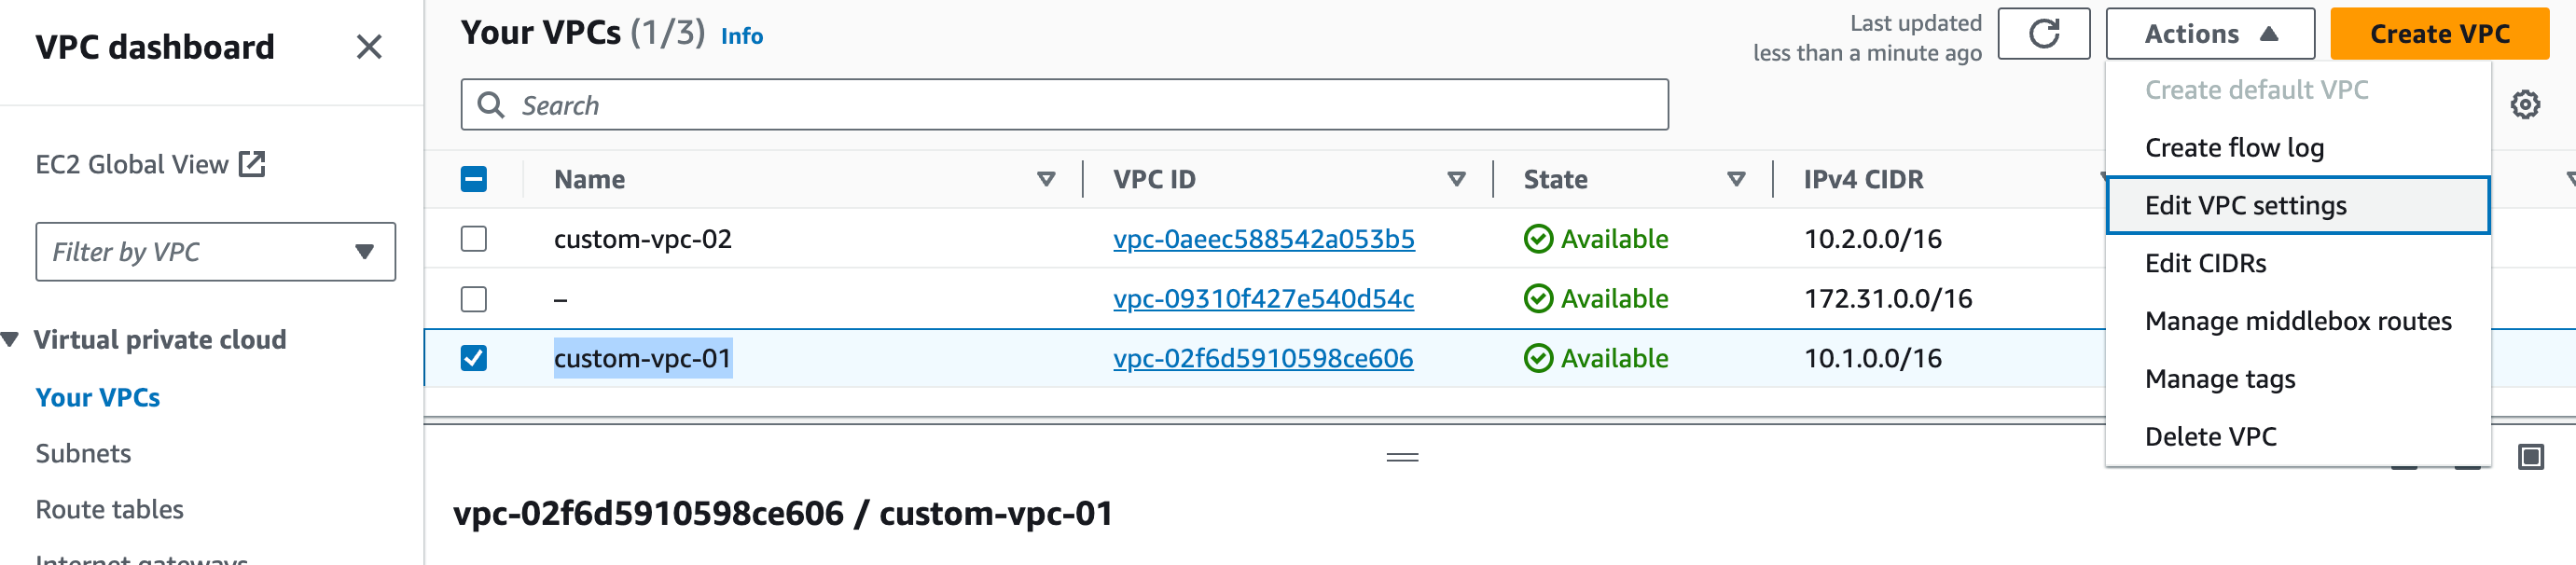
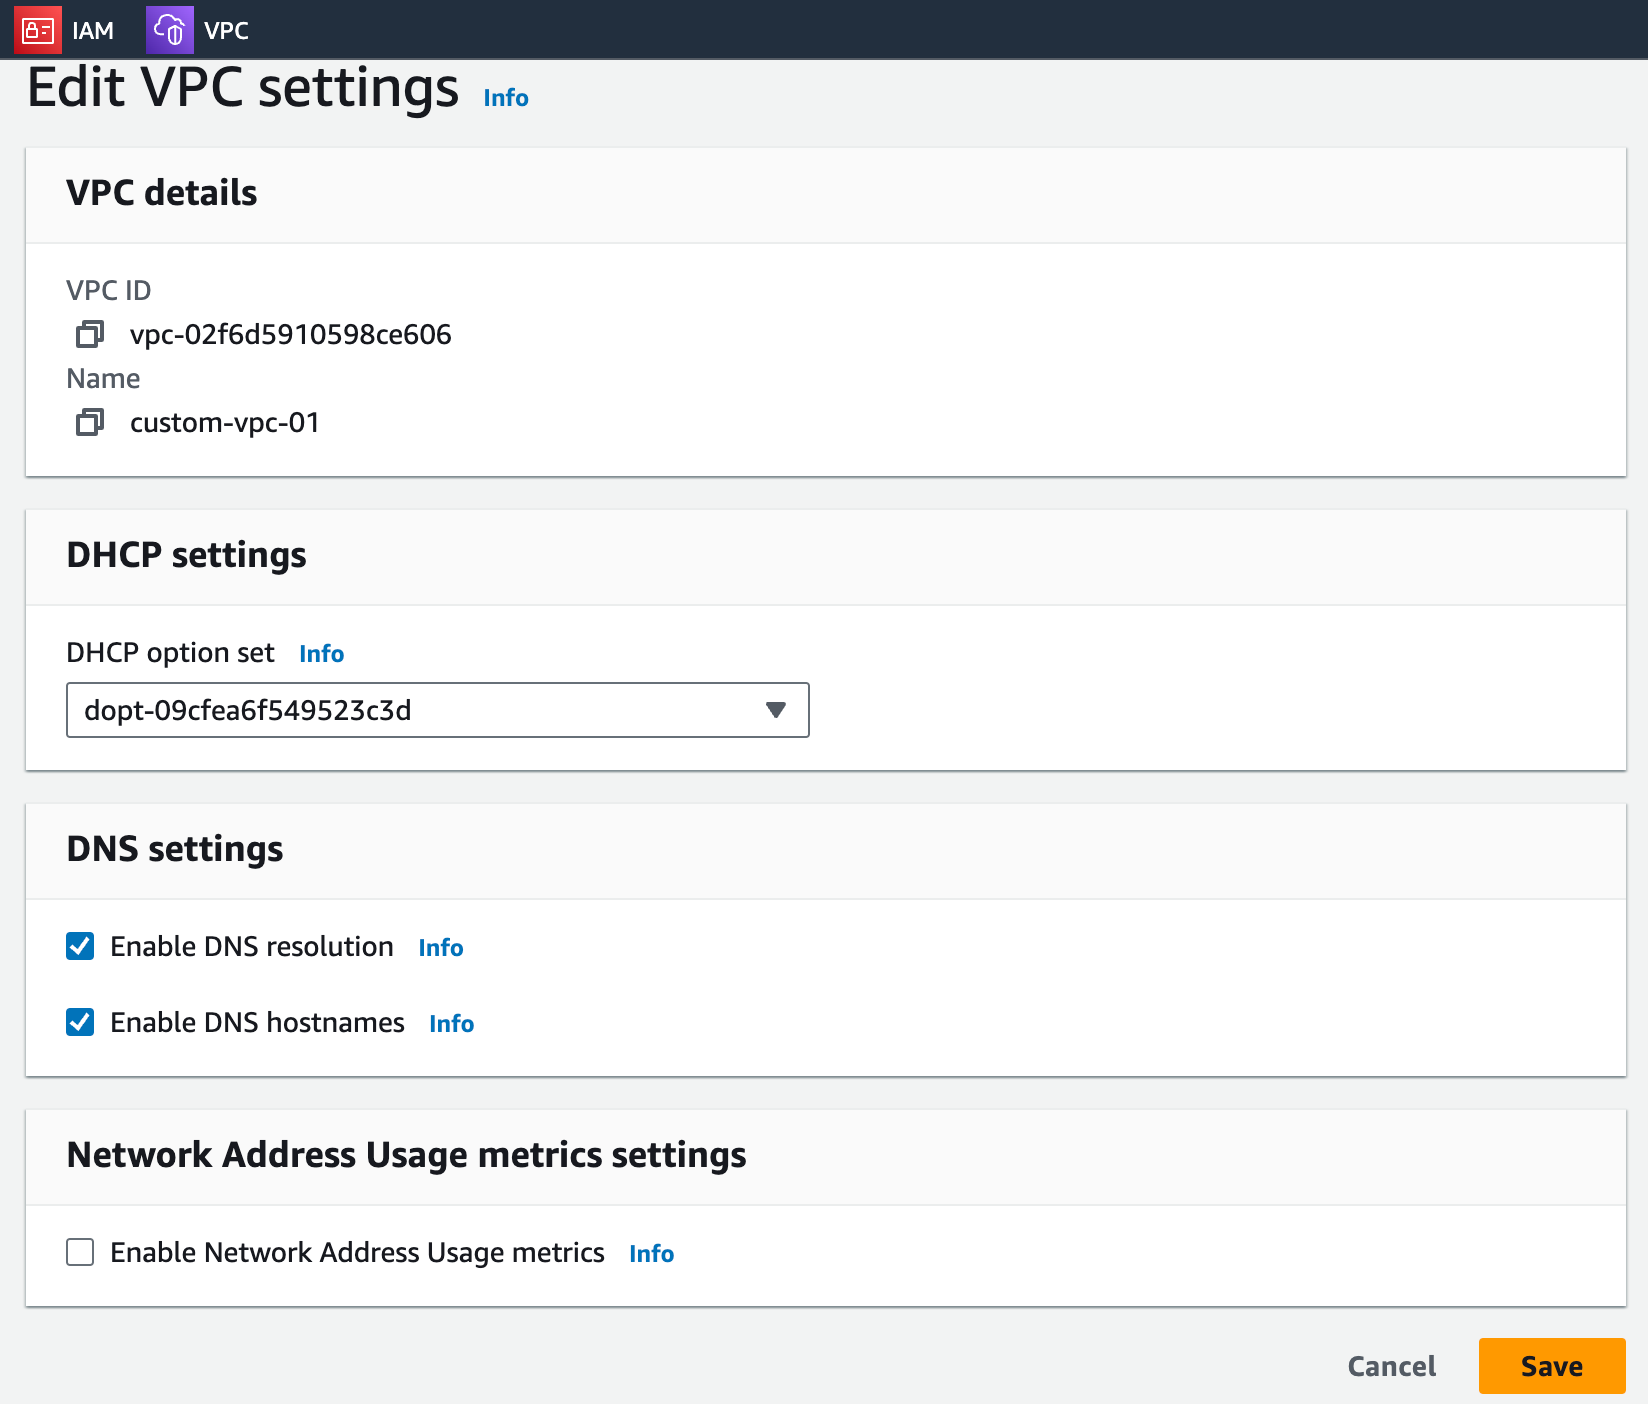
Click Save.
Perform the same steps for the “custom-vpc-02”
Step 8: Clean Up Resources
Delete Unnecessary Peering Connections:
If the peering connection is no longer needed, go to the VPC dashboard and delete the peering connections to prevent unwanted access or charges.
Now Delete VPC
6. Conclusion
Implementing VPC peering in AWS provides a secure and efficient way to enable private communication between different VPCs, enhancing the flexibility and security of your cloud infrastructure. This setup is essential for organizations looking to streamline their network architecture while maintaining strict data privacy and security standards. By following these steps, you can establish a robust network connection that leverages AWS's global infrastructure for optimal performance and reliability.
I have tested usecase 35 , and it is working as expected. This blog is updated with all the latest updates of AWS.
During the work around I have troubleshooted few steps with the help of the Careerbytecode team, which I am sharing here, hope it will helpful.
Post editing the DNS settings, the VPC peering will not be established unless the DNS host name is enable for the respective VPCs. Hence, the individual VPC has to be edited in the Actions which is available at the top left corner of the AWS VPC page.
Now you can ping the respective servers IPs to check for handshake.