

AWS Transit Gateway-The Ultimate Guide for Effective VPC Management
Managing multiple Virtual Private Clouds (VPCs) in AWS

1. Why We Need This Use Case
Managing multiple Virtual Private Clouds (VPCs) in AWS can become complex, especially as the number of VPCs grows. AWS Transit Gateway simplifies network management by acting as a central hub that connects multiple VPCs and on-premises networks. It streamlines traffic routing, reduces complexity, and improves scalability. This use case is ideal for organizations needing to manage inter-VPC communication, optimize network traffic, and enhance security through centralized control.
2. When We Need This Use Case
Growing Network Infrastructure: When managing multiple VPCs across different regions or accounts.
Centralized Network Management: To simplify the management of inter-VPC traffic and connectivity.
Cost Optimization: To reduce the costs associated with managing complex VPC peering connections.
Scalability Requirements: When needing a scalable solution to handle increasing network traffic and connectivity needs.
3. Prerequisites for the Lab
AWS Account: An active AWS account with the necessary permissions to create and manage Transit Gateway, VPCs, and related resources.
Basic Knowledge of AWS Networking: Understanding of VPCs, subnets, routing tables, and internet gateways.
AWS CLI or Management Console Access: Access to manage resources through AWS CLI or AWS Management Console.
Existing VPCs: At least two VPCs created that need to be connected using Transit Gateway.
4. Advantages and Disadvantages of This Use Case
Advantages:
Centralized Management: Simplifies network architecture by acting as a single gateway for multiple VPCs.
Scalability: Easily scale the network by attaching additional VPCs or on-premises networks.
Cost Efficiency: Reduces the need for multiple VPC peering connections, which can be costly and complex to manage.
Enhanced Security: Provides centralized control over network traffic and security policies.
Disadvantages:
Complexity in Setup: Initial configuration can be complex and requires careful planning.
Potential Cost: Transit Gateway incurs additional costs which need to be considered in the overall budget.
Single Point of Failure: Transit Gateway itself could become a single point of failure if not properly managed and monitored.
5. Step-by-Step Implementation Instructions
AWS Transit Gateway connects your Amazon Virtual Private Clouds (VPCs) and on-premises networks through a central hub. This connection simplifies your network and puts an end to complex peering relationships. Transit Gateway acts as a highly scalable cloud router—each new connection is made only once.
Before creating the transit gateway, we need 3 EC2 instances in 3 VPC. One instance is public and the other 2 are private.
Step 0:
Setup first below before go to step 1 to Transit VPC
Create a custom VPC
Create Public and Private subnets
Create Internet Gateway (IGW)
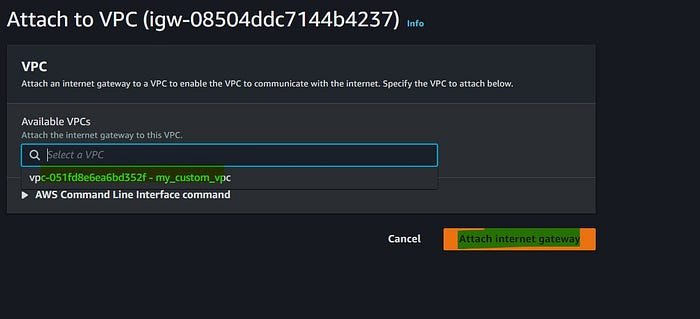
Attach IGW to the VPC
Create Route table
Subnet association to route table
Enable auto-assign public IPv4 for subnets
Create an EC2 machine using Custom VPC
Now it’s time for the demo:
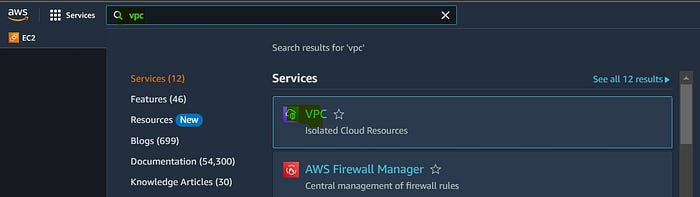
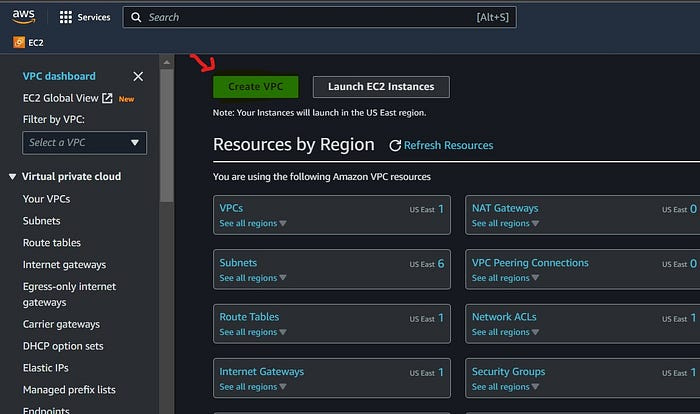
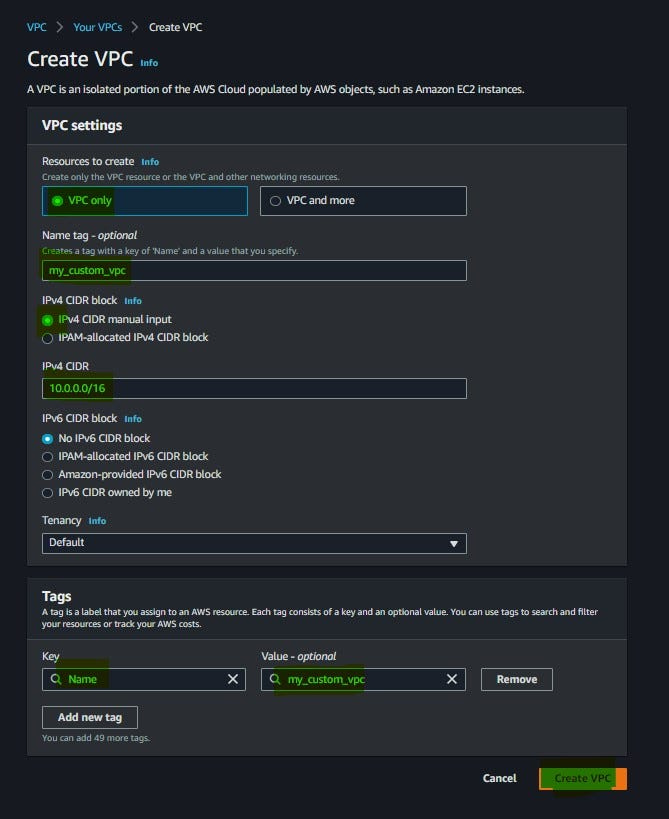
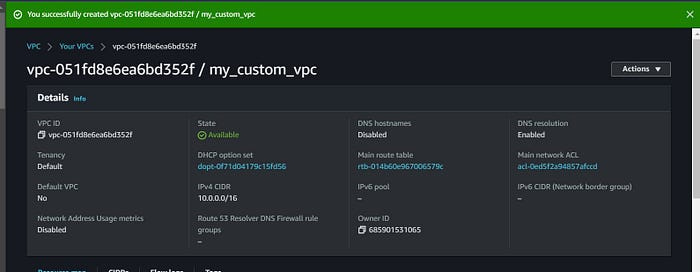
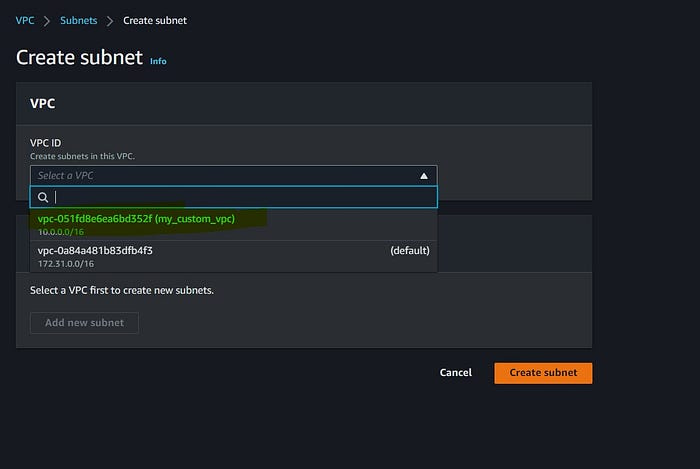
Create a custom VPC using the AWS management console
Login to your AWS account and search VPC and follow the below steps;
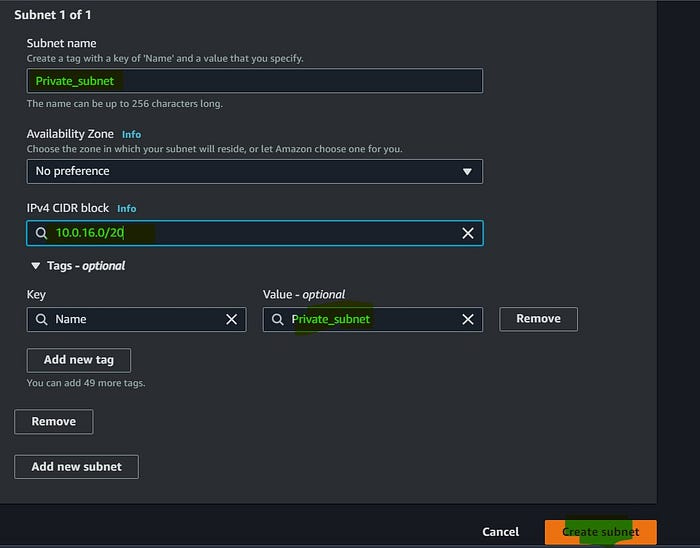
Create subnets
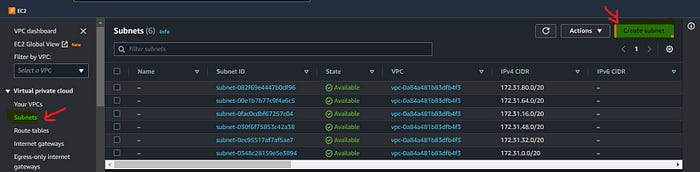
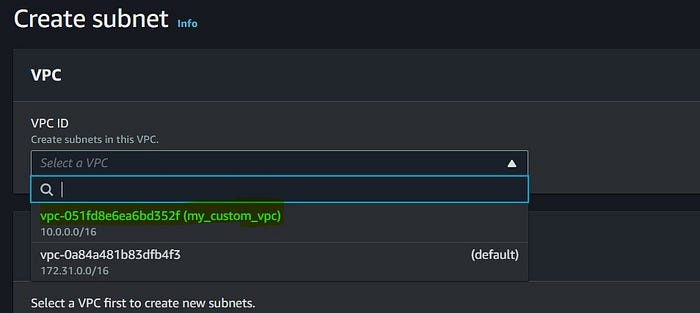
If you don’t know how to calculate CIDR then open the subnet calculator or click here. Enter your VPC CIDR and select a number of subnets based on the requirement. I selected No. of subnets as 16.
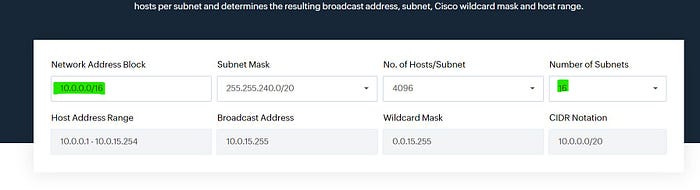
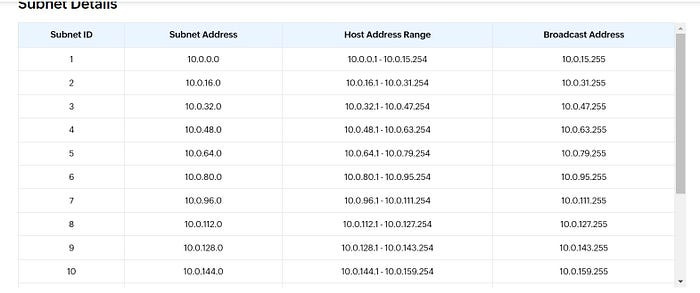
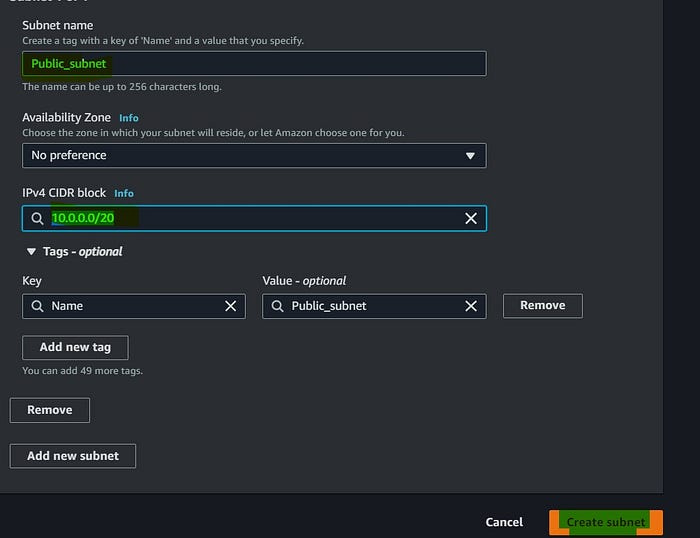
Choose the first subnet address and give CIDR notation /20 as you see below. I named this subnet as public which doesn’t mean that this subnet is public. You will see how to configure this as a public subnet in this demo.
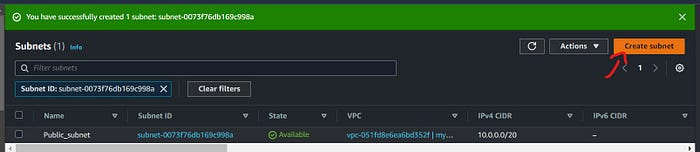
Now we have created 2 subnets and named them public and private. By default the subnet we create is private. Let’s see how we can configure our public subnet to make it public. Before that, we need to create IGW and attach IGW to the VPC.
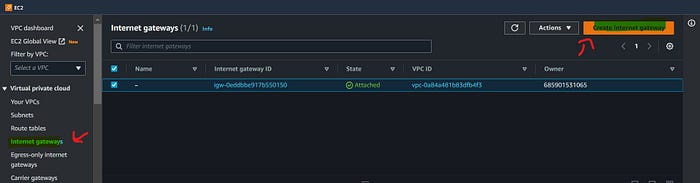
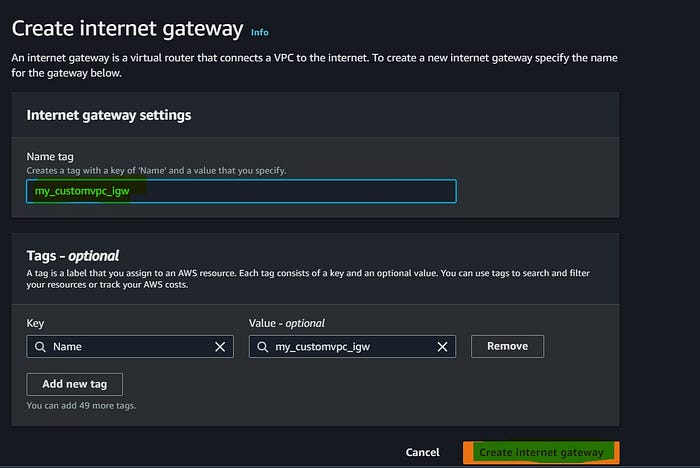
Create IGW

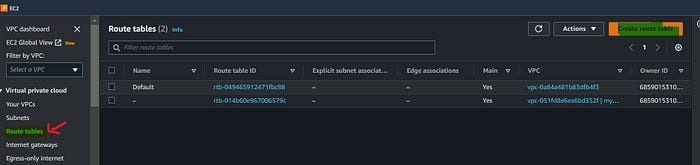
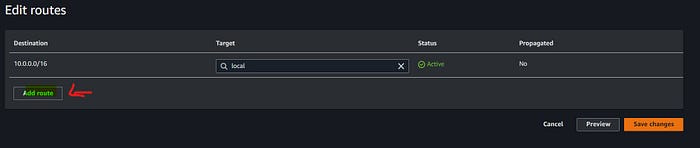
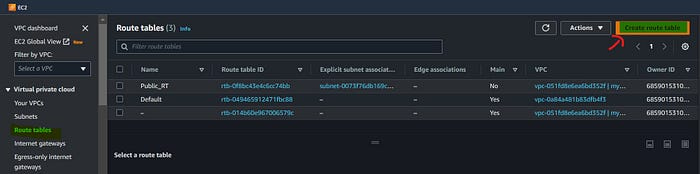
Now let’s create a Route table
By default, every subnet we create is associated with the main route table. First, we can create a public route table and we can associate the public subnet with this route. Let’s see how we create;

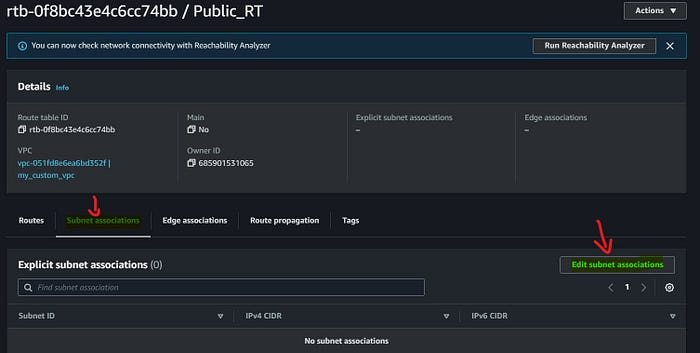
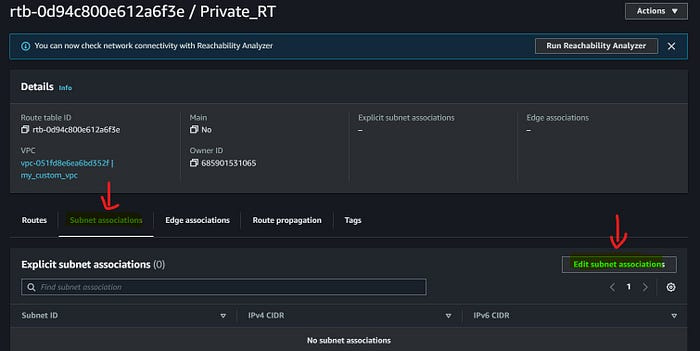
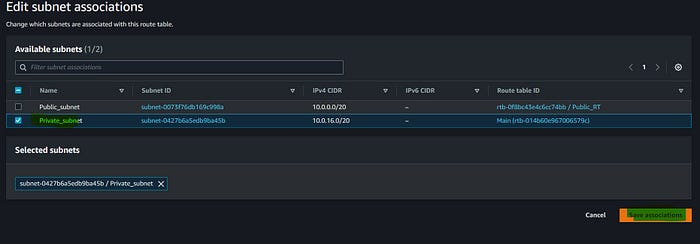
Open the route table we created → Subnet association → Edit subnet association
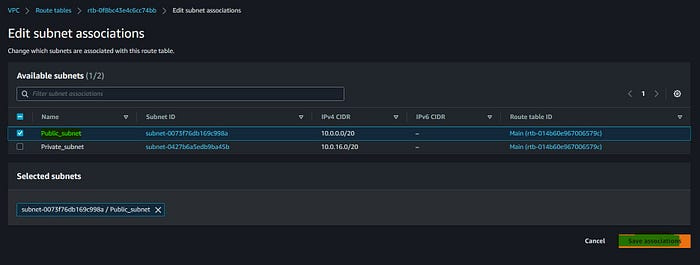
We have associated our public subnet with Public RT.
the subnet public now?.And the answer is No.
Ok then how we can make it public.
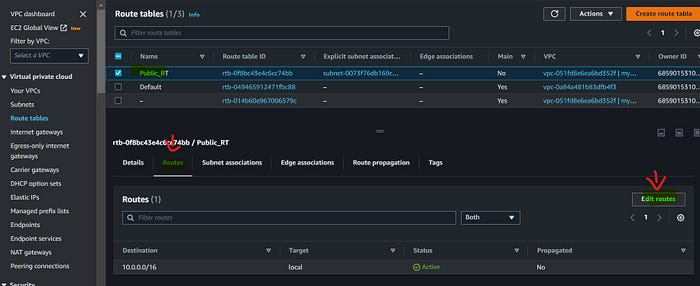
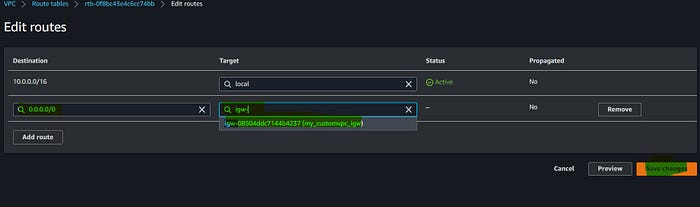
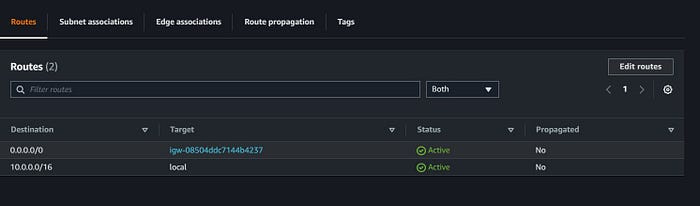
Now we can see our public route table has 2 targets.
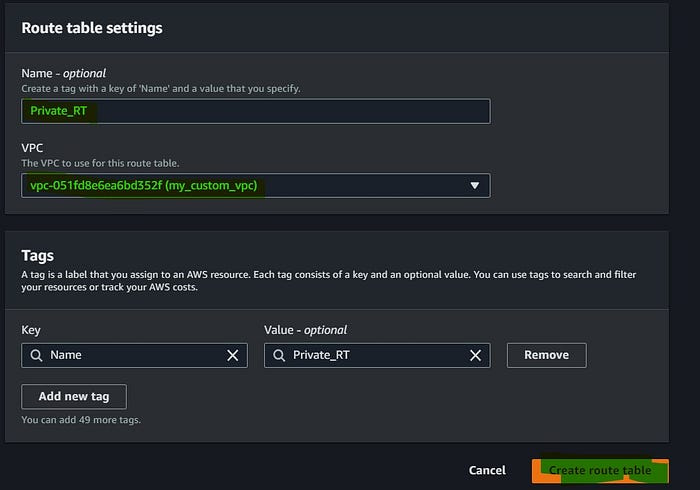
Create Private RT
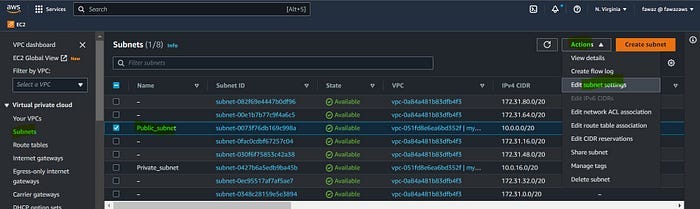
Enable auto-assign public IPv4 for public subnet

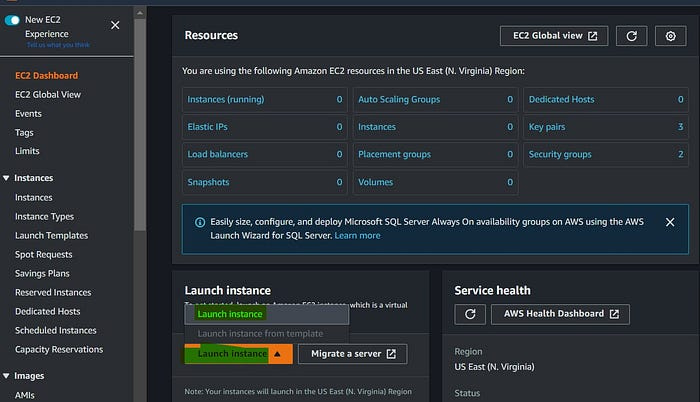
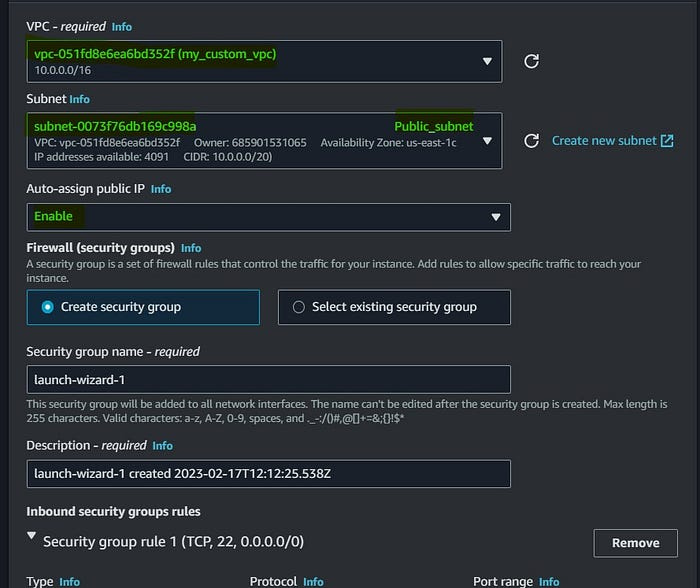
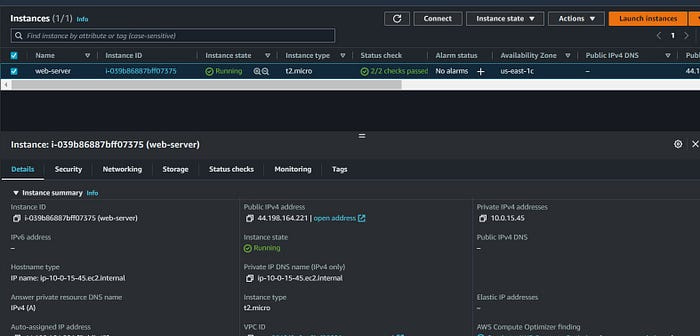
Create an EC2 machine using a public subnet.
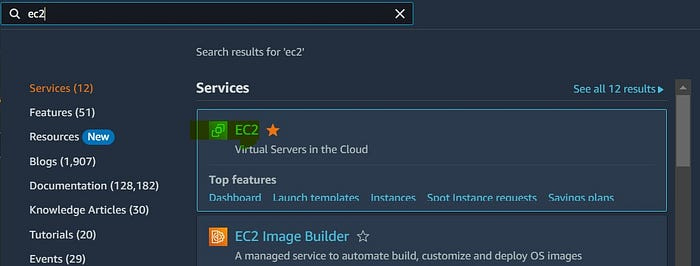
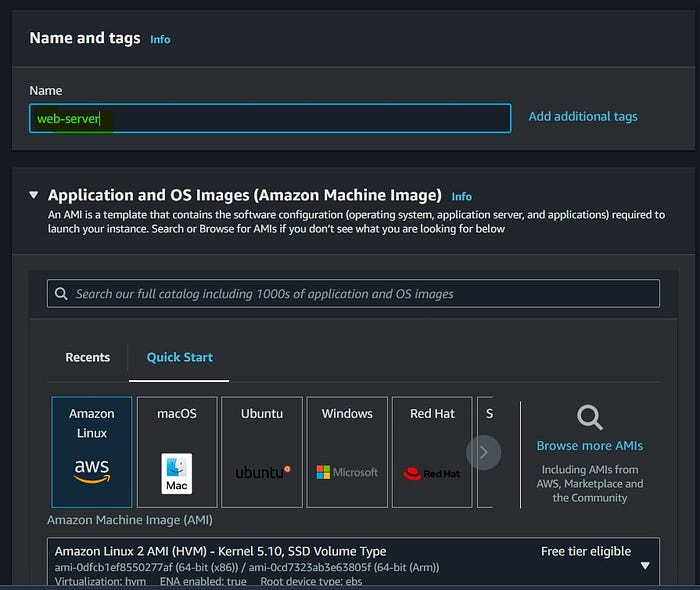
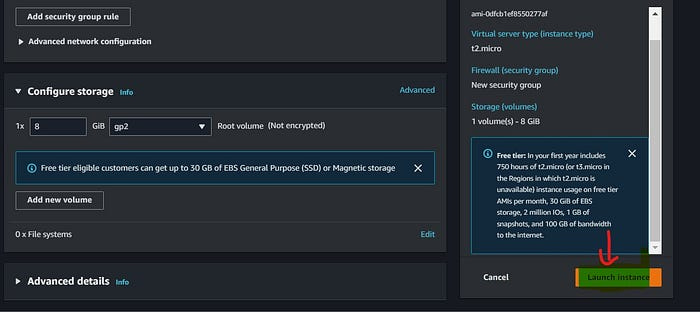
Name the instance and make sure that select the AMI and Instance type (t2.micro) are comes under the free tier.
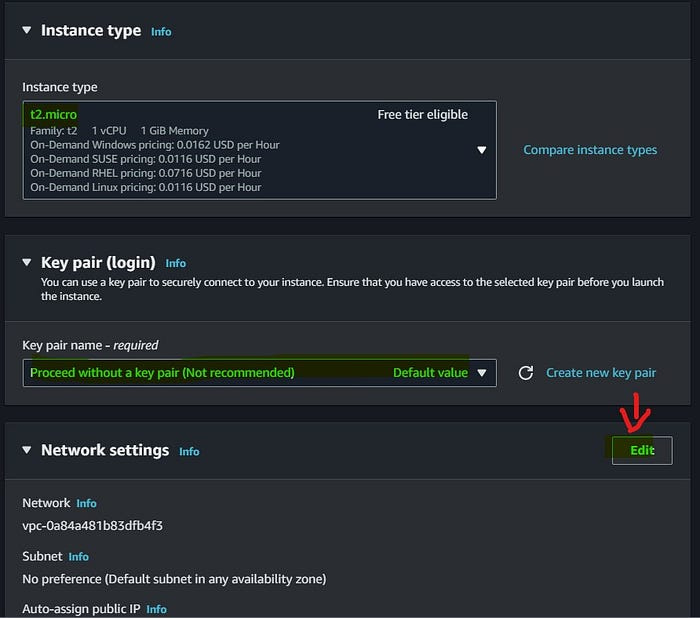
Dropdown and select the VPC we created for this demo. Make sure you selected public subnet.
Step 1:
Create 3 VPCs in the same region and subnets.
VPC A — 10.10.0.0/16 & 10.10.1.0/24 (public subnet) and create & attach IGW (Internet gateway)
VPC B — 10.20.0.0/16 & 10.20.1.0/24 (private subnet) don’t attach IGW
VPC C -10.30.0.0/16 & 10.30.1.0/24 (private subnet) don’t attach IGW


Once you create VPC and subnets it should look like this👆.
Now let’s move to the next task
Step 2 :
Create an ec2 instance in each VPC
VPC A instance under security group add the inbound rules as SSH and All traffic - 10.0.0.0/8
VPC B and VPC C instance security groups add the inbound rule as All traffic - 10.0.0.0/8
10.0.0.0/8 = This will help the instance to connect with all /16 CIDR VPCs

Now we have 1 public instance and 2 private instances
Connect the public instance and try to ping the private instance inside the public instance
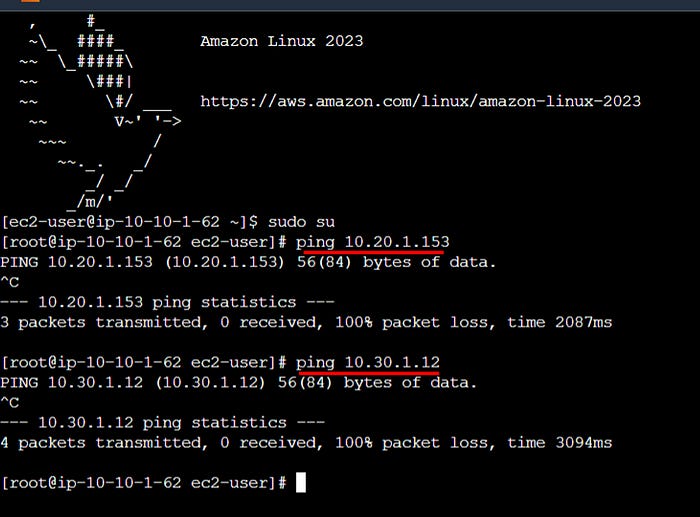
As we see above that we are not able to connect.
To resolve this issue, we need to create a Transit gateway and Transit gateway attachment then add the Transit gateway attachment to each subnet.
Follow the below steps;
Step 3 :
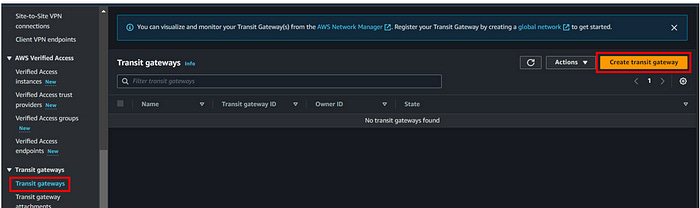
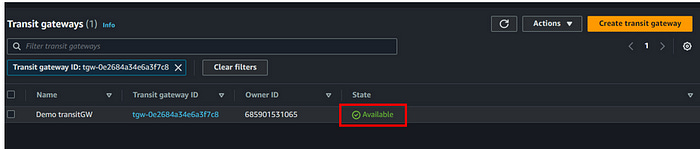
Create Transit Gateway
Go to AWS management console → VPC → Transit gateways → create transit gateway
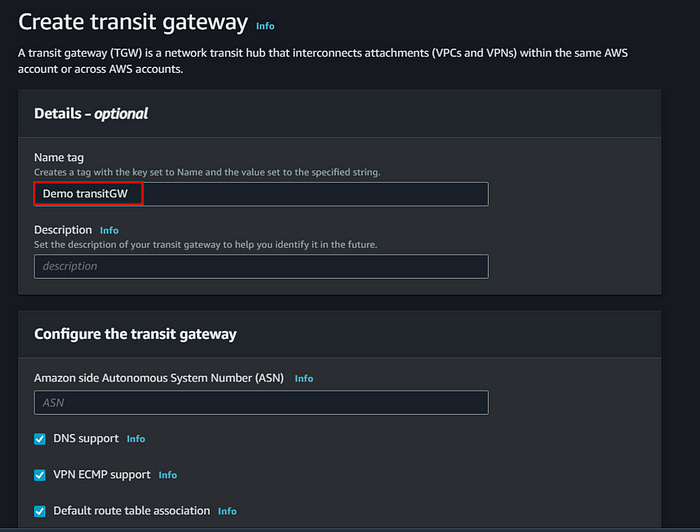
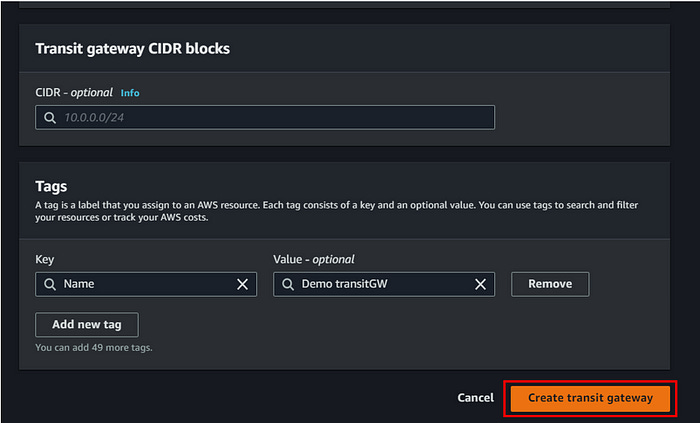
Give a name and leave everything default then click on create transit gateway
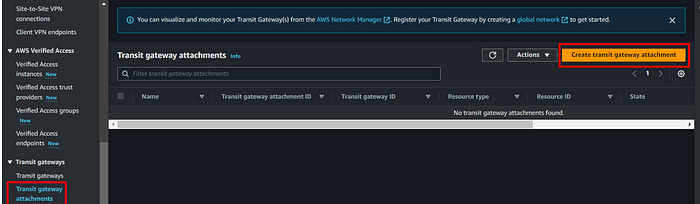
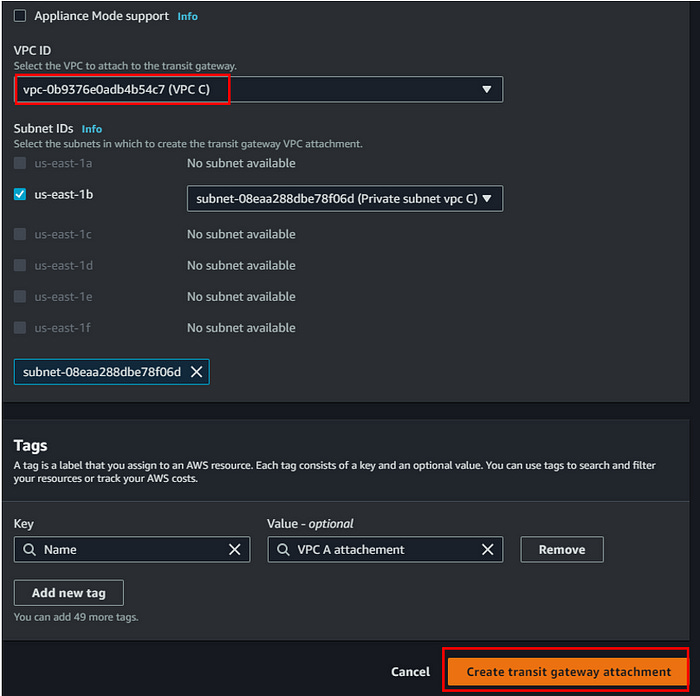
Next, we need to create a Transit Gateway attachment for each VPC we created.
To create a transit gateway attachment, follow the below steps;
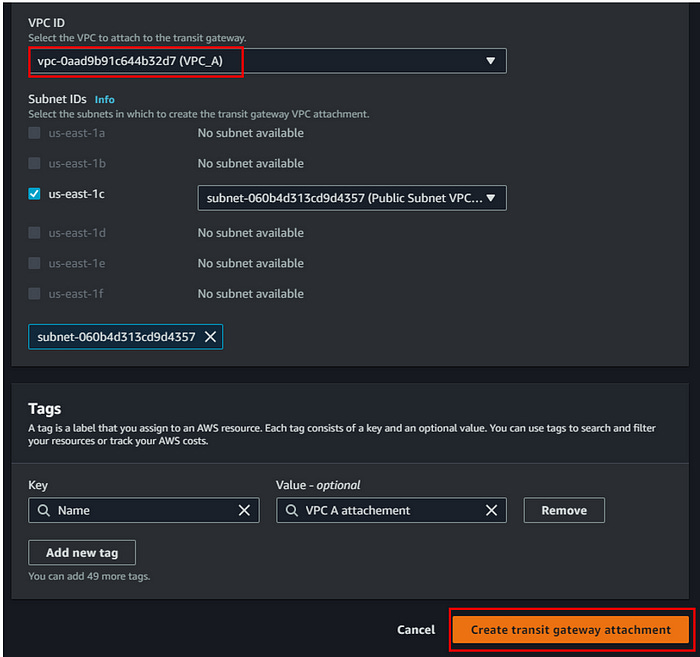
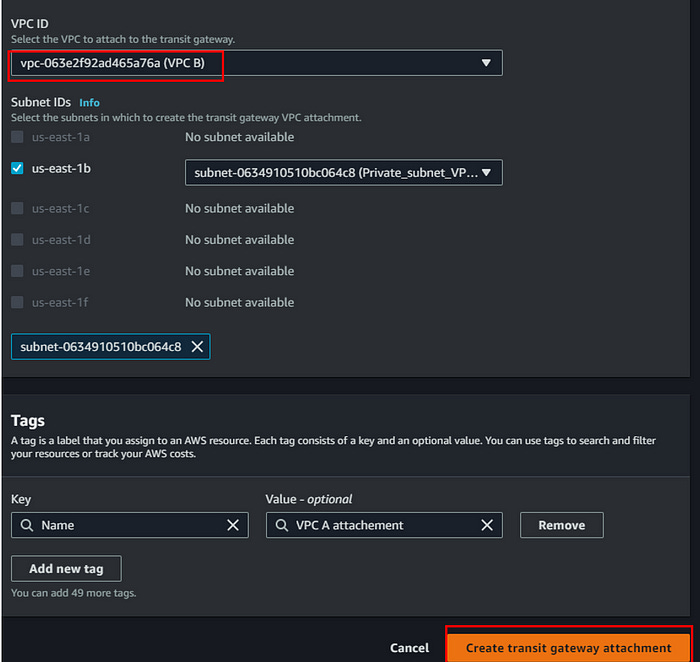
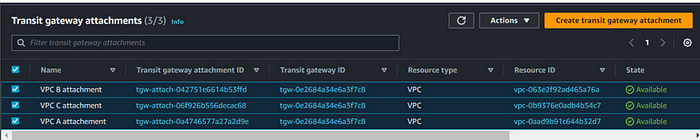
Go to VPC under transit gateway we can see the transit gateway attachment. Click on create transit gateway attachment. Create 3 TG attachment and map it with each VPC.

To connect we need to add this transit gateway attachment to each route table we created for each subnet.
To do that follow the below steps;
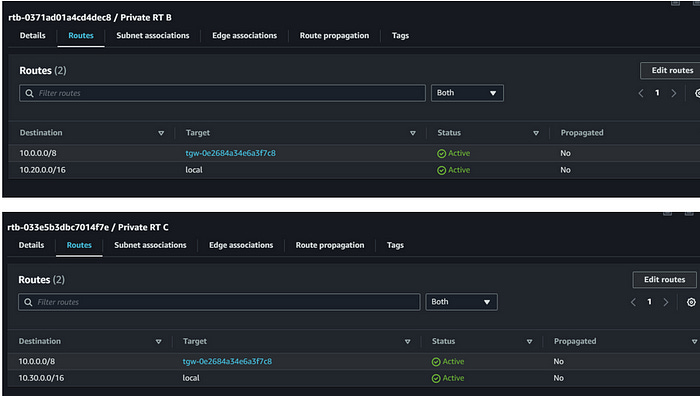
Go to route table → select each route table → click on edit routes → click on add routes → select transit gateway attachment we created → Save
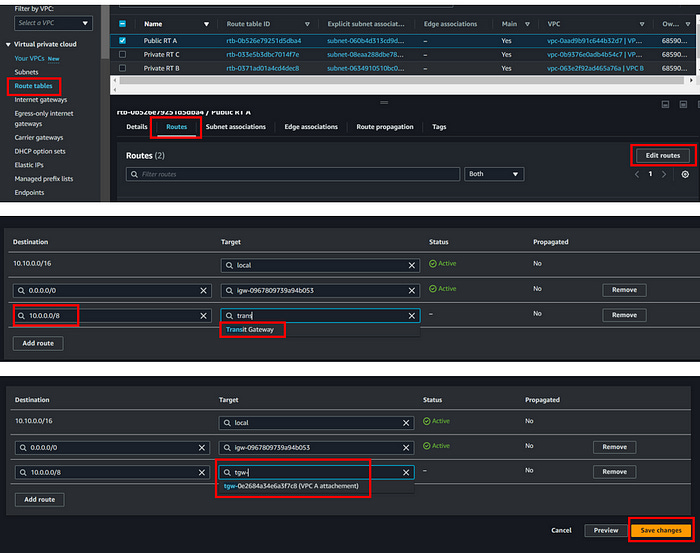
📌Do the same for other route tables as well
Once you are done with that, each route table should look like this👇
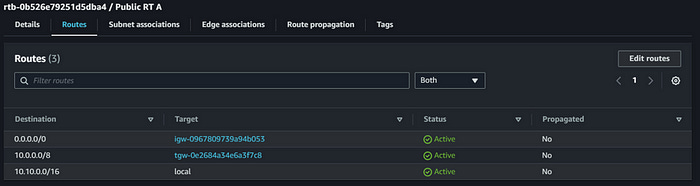
We have done with all the configurations.
Now if we go to the instance and try ping, we should be able to see it’s working
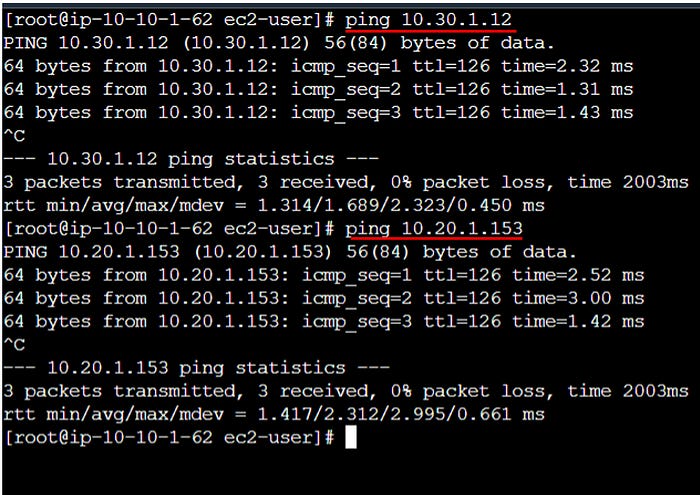
The transit gateway will be useful when we want to connect multiple VPCs. Instead of VPC peering we can go for transit gateways
With this, any VPC can connect to other VPCs which have the transit gateway rule attached
Step 4 :
Delete transit gateway attachments

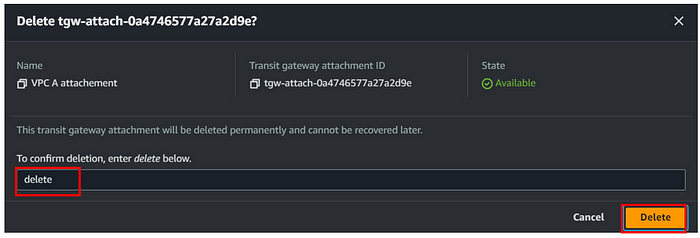
📌 delete all three attachments like this
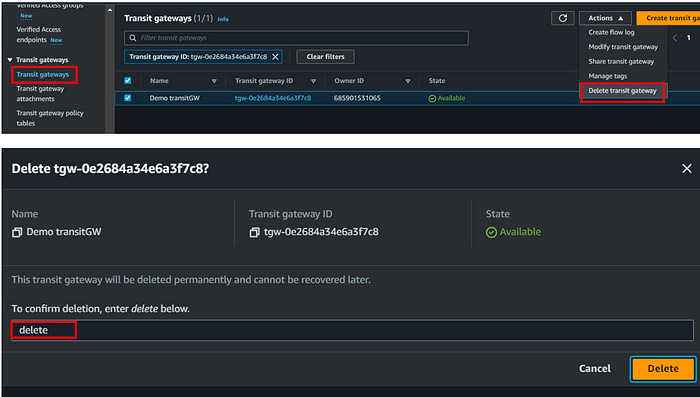
Delete transit gateway
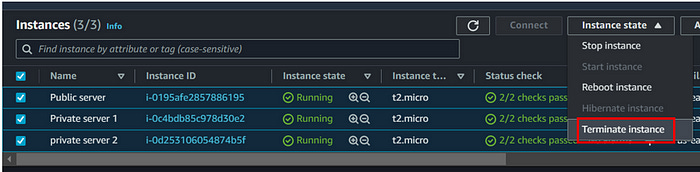
Terminate the instances we created for this demo
Delete VPCs (all three we created for this demo)
Select each VPC individually and delete

6. Conclusion
AWS Transit Gateway provides a streamlined approach to managing multiple VPCs by centralizing network management and simplifying inter-VPC communication. By following the steps outlined, you can set up a Transit Gateway to enhance scalability, reduce complexity, and optimize network traffic. Proper configuration and monitoring are essential to leverage the full benefits of Transit Gateway while managing costs and ensuring network resilience.
Detailed, step-by-step explanation for configuring an AWS Transit Gateway to enable connections between multiple Virtual Private Clouds (VPCs). It also covers the concepts of Internet Gateway (IGW), Public and Private subnet, and route table associations. Thanks.